FAQ
This is a community curated list of frequently asked questions (FAQ) about the installation, setup, and usage of Home Assistant. If you want to get details about a term, please check the glossary.
About Home Assistant
Can the rest of my household use Home Assistant?
Yes. Home Assistant is designed to be used by an entire household, not just the person who set it up.
You can add a user account for everyone in your home. Each user has their own login, their own settings, and can be marked as an administrator or a regular user. Regular users can control the home but cannot change settings, which keeps things safe for kids and visitors.
A few things help make Home Assistant feel friendly for everyone, not just the person who built it:
- The Home Assistant Companion app for Android and iOS lets each family member control the home from their own phone, with their own dashboards and notifications.
- Dashboards can be customized per user, so each person sees a layout that makes sense to them. A simple “everything in one place” view for partners and children, and a more detailed one for whoever likes to dive into the details.
- Voice control through the Home Assistant Voice Preview Edition, Apple Home, Google Home, or Amazon Alexa lets anyone in the home control devices by speaking, no app needed.
- AutomationsAutomations in Home Assistant allow you to automatically respond to things that happen in and around your home. [Learn more] run for the whole household automatically, so most day-to-day comfort and convenience just happens in the background without anyone having to think about Home Assistant at all.
A common piece of advice from long-time users is to optimize for the person in your household who is least interested in smart home technology. If the lights, the heating, and the front door just work, the rest of the family will love Home Assistant as much as you do.
Learn more:
Do Home Assistant updates break things?
For most users, updating Home Assistant is safe and uneventful.
A lot of the older articles and forum posts you may run into describe a time when updating Home Assistant was a real chore. You had to be careful, read every release note, and often dig into configuration files to fix things afterwards. That is no longer how it works for most people. Today, Home Assistant takes care of upgrading everything for you, including its operating system, the core, the user interface, and your appsApps are additional standalone third-party software packages that can be installed on Home Assistant OS. [Learn more].
A new version of Home Assistant is released on the first Wednesday of every month, with smaller fix releases in between. A few things make the update process safe by default:
- An automatic backup is taken before each update, so you can roll back if something does not work for you.
- Every release is preceded by a public beta period, so issues are usually found and fixed before the stable release.
- Breaking changes are documented in advance in the release notes, so you know what to look for.
- The built-in repair system proactively flags any issues after an update and walks you through how to resolve them.
- You can choose when to update, and skip a release if you prefer to wait.
When something does go wrong after an update, it usually affects a single integrationIntegrations connect and integrate Home Assistant with your devices, services, and more. [Learn more], especially community-maintained ones, rather than your whole installation. If you ever get stuck, you can restore the automatic backup and you are right back where you started.
Learn more:
Do I need to know how to code to use Home Assistant?
No. Home Assistant is designed to be used without writing any code.
A lot of older articles and forum posts you may run into describe a time when this was different. In its early years, Home Assistant really did require some technical comfort and a willingness to edit configuration files. That has changed: today, almost everything is done through the user interface.
Adding integrationsIntegrations connect and integrate Home Assistant with your devices, services, and more. [Learn more], building dashboards, and creating automationsAutomations in Home Assistant allow you to automatically respond to things that happen in and around your home. [Learn more] are all done through the user interface, with menus, forms, and drag and drop. Most people never need to open a configuration file.
YAMLYAML is a human-readable data serialization language. It is used to store and transmit data in a structured format. In Home Assistant, YAML is used for configuration, for example in the configuration.yaml or automations.yaml files. [Learn more] is available as an optional power-user feature for fine-grained control over complex setups, but it is not required to get a fully working smart home.
Learn more:
- Onboarding Home Assistant
- Adding integrations
- Automating Home Assistant
- Do I need to learn YAML to use Home Assistant?
Do I need to learn YAML to use Home Assistant?
No. You do not need to learn YAMLYAML is a human-readable data serialization language. It is used to store and transmit data in a structured format. In Home Assistant, YAML is used for configuration, for example in the configuration.yaml or automations.yaml files. [Learn more] to use Home Assistant.
This is one of the most common questions about Home Assistant, and the answer used to be different. In the early days of the project, almost everything was configured by editing YAML files by hand. That has not been the case for a long time. Today, the user interface handles the vast majority of setups, and YAML is only needed for a few specialized use cases.
Adding integrationsIntegrations connect and integrate Home Assistant with your devices, services, and more. [Learn more], building dashboards, and creating automationsAutomations in Home Assistant allow you to automatically respond to things that happen in and around your home. [Learn more] are all done from the user interface. The visual automation editor handles the vast majority of automations, and most integrations are set up through a guided dialog with menus and forms.
YAML is a simple text format that Home Assistant supports as an optional power-user feature. It is useful when you want to:
- Reuse the same configuration across many automations.
- Set up a small number of integrations that do not yet have a user interface.
- Keep your configuration in version control.
If none of that applies to you, you can safely ignore YAML and still get a fully working smart home.
Learn more:
Does Home Assistant work with Apple Home, Google Home, and Alexa?
Yes. Home Assistant works alongside Apple Home, Google Home, and Amazon Alexa, so you do not have to pick just one smart home platform.
You can expose your Home Assistant devicesA device is a model representing a physical or logical unit that contains entities. to:
- Apple Home, so you can control them from the Home app on your iPhone, iPad, or Mac, and ask Siri.
- Google Home, so you can control them from the Google Home app and ask Google Assistant.
- Amazon Alexa, so you can control them with Alexa-enabled speakers and displays.
This means a device that does not support, for example, Apple Home directly can still appear in the Home app once it is added to Home Assistant. You get to keep using the voice assistants and apps you already like, while Home Assistant works in the background to tie everything together.
Learn more:
- Apple HomeKit Bridge
- Google Assistant via Home Assistant Cloud
- Amazon Alexa via Home Assistant Cloud
- Browse all integrations
Does Home Assistant work without an internet connection?
Yes. Home Assistant runs on your own hardware in your home, so it can keep working when the internet is down.
Devices that talk to Home Assistant using local protocols, such as Zigbee, Z-Wave, Matter, Thread, and ESPHome, do not need any internet connection at all. Your lights, switches, sensors, and automationsAutomations in Home Assistant allow you to automatically respond to things that happen in and around your home. [Learn more] keep responding the same way they do every other day.
A few things still need the internet, and that is up to you:
- Devices that only talk to a vendor’s cloud. If a brand requires its own cloud service to work, that integration cannot reach the device when your internet is down. Whenever there is a local alternative, Home Assistant prefers it.
- Home Assistant Cloud features such as remote access, and the Apple Home, Google Home, and Amazon Alexa integrations.
- Updates and access to the appApps are additional standalone third-party software packages that can be installed on Home Assistant OS. [Learn more] store.
Choosing devices that work with Home Assistant locally is the most reliable way to keep your smart home running through any kind of internet outage. The Works with Home Assistant program highlights devices that have been tested for local control.
Learn more:
- Is Home Assistant reliable?
- Is my smart home data private with Home Assistant?
- Works with Home Assistant
How long does it take to set up Home Assistant?
The fastest way to get started is with Home Assistant Green, the official plug-and-play smart home hub. Basic setup takes about 15 minutes: plug it in, connect it to your network, and walk through the onboarding wizard in your browser.
If you have read older guides that describe Home Assistant as a weekend project, that used to be a fair description. Setting it up meant flashing an SD card, installing an operating system, and working through the initial configuration by hand. Home Assistant Green and the modern installers have removed almost all of that.
Adding your first integrationsIntegrations connect and integrate Home Assistant with your devices, services, and more. [Learn more] and building a dashboard typically takes another 30 to 60 minutes. Custom installations on a Raspberry Pi, mini PC, or virtual machine usually take 1 to 2 hours.
Home Assistant is designed to grow with you, so you can start with a few devices and a simple dashboard, and add more capabilities as you get comfortable.
Learn more:
Is Home Assistant free?
Yes. Home Assistant is free and open source. There is no subscription to use it, and no features are locked behind a paywall. You can install it, connect any number of devices, and build as many automationsAutomations in Home Assistant allow you to automatically respond to things that happen in and around your home. [Learn more] and dashboards as you like, without paying for the software itself.
The Home Assistant project is run by the Open Home Foundation, a non-profit dedicated to keeping smart home technology private, secure, and open.
A few things are paid, but always optional:
- The hardware Home Assistant runs on. Home Assistant Green is the recommended plug-and-play option, but you can also bring your own Raspberry Pi, mini PC, or virtual machine.
- Home Assistant Cloud, an optional subscription that pays for hosted services like easy remote access and integration with Apple Home, Google Home, and Amazon Alexa. Revenue from Home Assistant Cloud directly funds development of Home Assistant itself.
- Optional accessories like the Home Assistant Connect ZBT-2 for Zigbee, Thread, and Matter, or the Home Assistant Voice Preview Edition for local voice control.
You never need any of these to use Home Assistant. The full software is free, forever.
Learn more:
Is Home Assistant reliable?
Yes. Home Assistant is built to be reliable for everyday use in your home.
Local protocols like Zigbee, Z-Wave, Matter, Thread, and ESPHome run entirely on your own network, so they keep working when your internet connection or a vendor’s cloud goes down. This local control also means your automationsAutomations in Home Assistant allow you to automatically respond to things that happen in and around your home. [Learn more] keep running too.
A new version of Home Assistant is released on the first Wednesday of every month. An automatic backupHome Assistant has built-in functionality to create files containing a copy of your configuration. This can be used to restore your Home Assistant as well as migrate to a new system. The backup feature is available for all installation types. [Learn more] is taken before each update, and the built-in repair system proactively flags issues so you can resolve them before they become a problem.
Learn more:
Is my smart home data private with Home Assistant?
Yes. Privacy is one of the founding principles of Home Assistant.
Home Assistant runs on your own hardware in your home, and your data is stored locally. There is no Home Assistant account in the cloud and no third party gets access to your devices or your data.
Whenever a deviceA device is a model representing a physical or logical unit that contains entities. supports it, Home Assistant talks to it directly over your local network instead of going through a vendor’s cloud. Local protocols like Zigbee, Z-Wave, Matter, Thread, and ESPHome do not need any internet connection at all.
Optional services such as Home Assistant Cloud only do what you specifically enable, like remote access or connecting Home Assistant to Apple Home, Google Home, and Amazon Alexa.
Learn more:
What hardware do I need to run Home Assistant?
Home Assistant runs on a small device in your home that stays on all the time. There are several options, depending on how much you want to do yourself:
- Home Assistant Green is the recommended option for most people. It is a plug-and-play smart home hub that comes with Home Assistant already installed. You connect it to your network, and you are ready to go.
- Home Assistant Yellow is for users who want a more powerful, expandable hub with built-in Zigbee and Thread radios.
- A Raspberry Pi, mini PC, NUC, or virtual machine is a good option if you already own suitable hardware or want to run Home Assistant alongside other services.
You may have read that you need a Raspberry Pi to run Home Assistant. That used to be the most common option, but it is no longer the only one. Home Assistant Green now provides a true plug-and-play experience for people who do not want to source and assemble their own hardware.
You can also add accessories like the Home Assistant Connect ZBT-2 for Zigbee, Thread, and Matter, or the Home Assistant Voice Preview Edition for local voice control.
Learn more:
Who is Home Assistant for?
Home Assistant is used by millions of households around the world, ranging from people setting up their first smart home to long-time enthusiasts.
In its early years, Home Assistant was primarily a project for developers and hobbyists, and a lot of older articles still describe it that way. The project has grown a lot since then, and the user base has grown with it. Today, plenty of people who would not call themselves technical use Home Assistant every day.
It is a particularly good fit if you:
- Want your smart home to work with any brand of device, not just one ecosystem.
- Prefer your data and automations to stay in your own home.
- Want your smart home to keep working when the internet or a vendor’s cloud goes down.
- Are tired of juggling a separate app for every brand you own.
Home Assistant Green provides an easy entry point if you are new to the world of smart homes, and the same Home Assistant grows with you as you add more devices and ideas.
Learn more:
- Home Assistant Green
- Getting started
- Browse all integrations
- What hardware do I need to run Home Assistant?
Common
When is the next Home Assistant release?
A new stable version of Home Assistant is released on the first Wednesday of every month. The exact dates are listed in the upcoming events calendar on the Home Assistant Developers website.
You can browse the full release history and announcement blog posts for any past release.
Are the monthly releases stable?
Yes. The monthly releases are the stable releases of Home Assistant, and they are the version we recommend everyone runs. Each release goes through:
- A beta period of about a week during which the release candidate is tested by thousands of users on real-world setups.
- Continuous automated testing across hundreds of integrationsIntegrations connect and integrate Home Assistant with your devices, services, and more. [Learn more] on every change.
- Smaller patch releases (for example,
2026.5.1,2026.5.2) during the month if any important issues turn up after the initial release.
Updates can be installed straight from the user interface, and an automatic backup is taken before every update so you can roll back if something does not work for you. For more on this, see Do Home Assistant updates break things?.
Helping test the next release
The last week before each release is the beta period. If you would like to help test the next release, you can opt in to the beta channel from Settings > System > Updates. Beta testers can read the beta release notes, get help in the #beta channel of the Home Assistant Discord server, and are encouraged to report issues on GitHub.
Configuration
My integration does not show up
If an integrationIntegrations connect and integrate Home Assistant with your devices, services, and more. [Learn more] you set up does not appear in Home Assistant, the reason is almost always in the logs. Go to Settings > System > Logs and look for errors that mention the integration.
If you configured the integration through configuration.yamlThe configuration.yaml file is the main configuration file for Home Assistant. It lists the integrations to be loaded and their specific configurations. In some cases, the configuration needs to be edited manually directly in the configuration.yaml file. Most integrations can be configured in the UI. [Learn more] and the YAML file has a mistake, Home Assistant will refuse to load the affected parts. You can check your configuration before restarting:
Most integrations are set up through the user interface and do not require any YAML at all. See Do I need to learn YAML to use Home Assistant? for more on when YAML is and is not needed.
Why does Home Assistant use YAML for power-user configuration?
Most things in Home Assistant are configured through the user interface and you never need to look at a configuration file. For the small number of power-user settings that are still configured in a file, Home Assistant uses YAML rather than JSON or XML because YAML is much friendlier to read and write by hand. There are no commas to forget, no closing tags to balance, and indentation makes the structure of the document obvious.
If you are wondering whether you need to learn YAML at all, see Do I need to learn YAML to use Home Assistant?
Why does this entity not have a unique ID?
When you open the configuration dialog of an entityAn entity represents a sensor, actor, or function in Home Assistant. Entities are used to monitor physical properties or to control other entities. An entity is usually part of a device or a service. [Learn more], you may see this message:
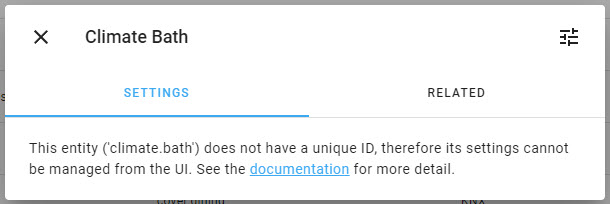
A unique ID is a permanent identifier (for example, a serial number) that is guaranteed never to change. Without one, Home Assistant cannot safely let you rename the entity or change its settings from the user interface, because there would be no reliable way to track which entity you meant.
You will typically see this on entities you created manually in YAML, or on entities from an integrationIntegrations connect and integrate Home Assistant with your devices, services, and more. [Learn more] that has no way to determine a unique ID for the underlying device. This is not an error, but a limitation of the integration. A few integrations (such as template and mqtt) let you define a unique ID yourself in YAML.
Where each ID is used
Unique ID:
- Used only internally in Home Assistant.
Entity ID:
- Entity with a unique ID: the entity ID is only used as a reference, for example in automations or dashboards.
- Entity without a unique ID: the entity ID acts as the replacement for the missing unique ID, and as the reference in automations or dashboards.
Can the IDs be changed?
Unique ID:
- No. It is a static identifier.
Entity ID:
- Entity with a unique ID: the entity ID can be changed freely, as long as it follows the format
<domain>.<id>and does not collide with another entity. If you change the entity ID, remember to update the references in automations and dashboards. - Entity without a unique ID: the entity ID is treated as a fixed identifier and cannot be changed.
If your entity has no unique ID, you can still adjust some properties through the manual customization options in YAML.
Can I add a unique ID myself?
No. As an end user, you cannot add a unique ID to an entity that does not have one. Unique IDs must come from the integration itself, because they need to consistently identify the same physical device or service across restarts.
If an integration does not provide unique IDs, it could potentially be improved to do so. Contributions are welcome. See the developer documentation to get started, and the entity registry documentation for more on unique IDs.
Documentation
The documentation is missing or out of date
Good documentation matters to us. Home Assistant has well over a thousand integrationsIntegrations connect and integrate Home Assistant with your devices, services, and more. [Learn more], ships a new release every month, and is used by people with very different backgrounds. We are actively investing in making the documentation more approachable, more complete, and more useful for everyone, from someone setting up their very first smart home to a long-time enthusiast.
That said, the documentation is huge, and rewriting and modernizing all of it is not something that can be done in a day or two. You may still come across pages that are out of date, incomplete, or written more for developers than for end users. We are working through them.
If you spot something that is wrong or unclear, please tell us. Most documentation pages have a Provide feedback button at the bottom. Selecting it lets you describe what is missing or wrong, and the page address and Home Assistant version are filled in for you. Even short notes help us a lot, because we cannot fix what we do not know about.
If you would like to go a step further and propose the actual change yourself, every page also has an Edit link at the bottom that opens the source of that page directly on GitHub, so you can suggest a fix as a pull request. A step-by-step guide is available on the Home Assistant community forum.
What tools do you use to build the documentation?
The Home Assistant website is a Jekyll site. The pages are written in Markdown with some Liquid templating, the source is hosted on GitHub, and the site is built and deployed by Netlify.
This setup works well for an open-source project: every page has an Edit this page on GitHub link, so anyone can suggest changes through a pull request without needing to learn a separate publishing platform.
Home Assistant
404 Client Error: Not Found (’no such image: homeassistant/…)
This error means an update or appApps are additional standalone third-party software packages that can be installed on Home Assistant OS. [Learn more] could not be downloaded to your system. In almost every case, this is because there is not enough free disk space.
A few things to check:
- Free disk space. Go to Settings > System and look at the storage information. If your system is nearly full, you will need to free up space, or move to larger storage.
- Virtual machine disk size. The default Home Assistant virtual machine image is around 6 GB, which is fine to get started but quickly becomes too small. We recommend at least 32 GB.
- Network connection. If your system has plenty of space, the download may have failed due to a temporary network problem. Wait a few minutes and try again.
If the issue keeps happening, share the full error from Settings > System > Logs when asking for help.
Can I run Home Assistant from a USB drive on a Raspberry Pi 4?
Yes, but with caveats. There are two ways to use a USB drive with a Raspberry Pi 4.
Recommended: data disk on USB
Home Assistant Operating SystemHome Assistant OS, the Home Assistant Operating System, is an embedded, minimalistic, operating system designed to run the Home Assistant ecosystem on single board computers (like the Raspberry Pi) or Virtual Machines. It includes Home Assistant Core, the Home Assistant Supervisor, and supports apps. Home Assistant Supervisor keeps it up to date, removing the need for you to manage an operating system. Home Assistant Operating System is the recommended installation type for most users. has a data disk feature that moves all your data to an attached USB drive (such as an SSD), while the SD card stays in place to boot the operating system. This gives you most of the speed and reliability benefits of an SSD without the complexity of booting from USB. See using an external data disk for instructions.
Booting fully from USB
Booting Home Assistant Operating System completely from a USB drive (without an SD card) is possible with some devices, but it is delicate. The boot process passes through firmware, U-Boot, and the operating system, each of which has to negotiate with the USB device, and there is a real chance of the boot failing at one of these stages.
USB drives that are known to work with Raspberry Pi OS (see the Raspberry Pi forum) are more likely to work with Home Assistant Operating System. However, because Home Assistant Operating System has U-Boot in the boot chain, some drives that work fine on Raspberry Pi OS do not work on Home Assistant Operating System. Finding the right combination of hardware can take some experimentation.
If you simply want a more reliable storage setup than an SD card, the data disk option above is the safer route.
Do I need to leave the USB stick connected for Wi-Fi?
No. The USB CONFIG stick is only used once, to import a network profile into /etc/NetworkManager/system-connections/. After that, you can safely remove it. Home Assistant remembers your Wi-Fi settings without the stick.
I’m trying to find my files on the host or SD card. Where are they?
On a Home Assistant Operating SystemHome Assistant OS, the Home Assistant Operating System, is an embedded, minimalistic, operating system designed to run the Home Assistant ecosystem on single board computers (like the Raspberry Pi) or Virtual Machines. It includes Home Assistant Core, the Home Assistant Supervisor, and supports apps. Home Assistant Supervisor keeps it up to date, removing the need for you to manage an operating system. Home Assistant Operating System is the recommended installation type for most users. installation, your files are on the data partition within /mnt/data/supervisor/.
On the SD itself, this is an EXT4 partition labeled hassos-data.
For information on file access, refer to the section on configuring access to files.
Why does the start button for an app flash red when I select it?
A red flash on the start button means the appApps are additional standalone third-party software packages that can be installed on Home Assistant OS. [Learn more] failed to start or install. The reason is in the logs.
Go to Settings > System > Logs and select the relevant app from the dropdown to see why it failed to start. Common causes include a port that is already in use, missing configuration, or a hardware device that is not available.
Installation
What is the difference between Home Assistant Operating System and Home Assistant Container?
Home Assistant offers two installation methods: Home Assistant Operating SystemHome Assistant OS, the Home Assistant Operating System, is an embedded, minimalistic, operating system designed to run the Home Assistant ecosystem on single board computers (like the Raspberry Pi) or Virtual Machines. It includes Home Assistant Core, the Home Assistant Supervisor, and supports apps. Home Assistant Supervisor keeps it up to date, removing the need for you to manage an operating system. Home Assistant Operating System is the recommended installation type for most users. and Home Assistant ContainerHome Assistant Container is a standalone container-based installation of Home Assistant Core. Any OCI compatible runtime can be used, but the documentation focus is on Docker. [Learn more]. Both run the same Home Assistant software, so the choice is mostly about how much of the underlying system you want to manage yourself.
Home Assistant Operating System is the recommended installation method for almost everyone. It is an all-in-one solution that includes the operating system, Home Assistant itself, and a management user interface. It supports appsApps are additional standalone third-party software packages that can be installed on Home Assistant OS. [Learn more], takes care of upgrading everything for you, and powers official hardware like Home Assistant Green and Home Assistant Yellow.
Home Assistant Container runs Home Assistant as a Docker container on a Linux system you provide and maintain yourself. It is intended for people who already run Docker and want to integrate Home Assistant with their existing setup. Home Assistant Container does not support apps, and you are responsible for updates and the host operating system.
You may still see references to “Home Assistant Core” or “Home Assistant Supervised” in older articles. These were earlier installation methods that are no longer offered or supported. Today’s recommended path is Home Assistant Operating System.
Learn more:
Usage
After updating, my browser login gets stuck
In rare cases, an old browser cache can prevent the login page from loading after a Home Assistant update. The fix is the same as for any other caching issue: refresh the page or clear the cache for Home Assistant.
For step-by-step instructions, see The Home Assistant user interface is acting weird.
Connection error
A connection error in the logs almost always means a device, service, or network on your side is unreachable, not a bug in Home Assistant. For example:
ConnectionRefusedError: [Errno 111] Connection refused
A few things to check:
- The device or service that the integrationIntegrations connect and integrate Home Assistant with your devices, services, and more. [Learn more] talks to is powered on and reachable on your network.
- Your network is healthy. Routers, DNS, or DHCP problems can take services offline.
- For cloud services, check the provider’s status page. The internet service may be temporarily down.
If the error mentions a specific integration, the integration page often has a troubleshooting section with more focused advice.
Problems with dependencies
Almost all problems with dependencies in Home Assistant come from custom integrationsIntegrations connect and integrate Home Assistant with your devices, services, and more. [Learn more] that you installed from outside the official integration store, such as through HACS.
Home Assistant tests and ships its own set of dependencies for every official integration, and updates them together. You should not see dependency errors from official integrations in normal use. If you do, please report it so we can investigate.
For custom integrations, dependency issues can happen when the custom integration has not yet been updated for a new Home Assistant release, or when it conflicts with another custom integration. The first step is to restart Home Assistant and check the logs for the exact error. From there:
- Check whether the custom integration has a newer version available, and update it.
- Check the custom integration’s issue tracker to see if others are seeing the same problem.
- If the issue started right after a Home Assistant update, you can restore an automatic backup from before the update, if one is available, while you wait for the custom integration to be fixed.
The Home Assistant user interface is acting weird
If buttons, cards, or whole pages start to look or behave strangely, it is almost always a caching issue. The Home Assistant user interface caches a lot of things in your browser to make it fast, and sometimes that cache gets out of sync with what is actually running on your Home Assistant.
This typically happens after:
- Installing, updating, or removing a custom card or custom dashboard element from outside the official integration store, such as through HACS.
- In rare cases, after a Home Assistant update.
To fix it:
- Close all browser tabs and Home Assistant app windows that have Home Assistant open.
- Open Home Assistant again. In most cases, this is enough.
- If the issue is still there, do a hard refresh of the page, or clear your browser cache for Home Assistant, and try again.
A hard refresh reloads the page while bypassing the cache:
- On Windows and Linux, press
Ctrl+F5orCtrl+Shift+R. - On macOS, press
Cmd+Shift+R. - On the Home Assistant Companion app for Android or iOS, pull down on the page to refresh.
If a hard refresh is not enough, you can clear the browser cache for Home Assistant specifically:
-
Chrome, Edge, or Brave: Open Home Assistant, then press
F12to open the developer tools. Right-click the refresh button in the browser toolbar and select Empty cache and hard reload. - Firefox: Open the menu, go to Settings > Privacy & Security > Cookies and Site Data > Manage Data, search for your Home Assistant address, select it, and select Remove Selected.
- Safari: Open Safari > Settings > Privacy > Manage Website Data, search for your Home Assistant address, select it, and select Remove.
- Home Assistant Companion app: Go to Settings in the app and select Reset frontend cache.
If a specific custom card is the cause, removing or updating that card will resolve it.
found character ’ ’ that cannot start any token
This error means a tab character was used instead of two spaces in one of your YAMLYAML is a human-readable data serialization language. It is used to store and transmit data in a structured format. In Home Assistant, YAML is used for configuration, for example in the configuration.yaml or automations.yaml files. [Learn more] configuration files. Replace the tab with two spaces and the error will go away.
You only need to think about this if you edit YAML by hand. Most users never do, since integrationsIntegrations connect and integrate Home Assistant with your devices, services, and more. [Learn more], dashboards, and automationsAutomations in Home Assistant allow you to automatically respond to things that happen in and around your home. [Learn more] are all configured through the user interface. If you have not opened a YAML file yourself, this error is most likely coming from a custom integration or a snippet you copied in from somewhere else.
Learn more: