Time & Date
The Time & Date integrationIntegrations connect and integrate Home Assistant with your devices, services, and more. [Learn more] provides sensors for the current date or time in different formats. All values are based on the time zone configured under Settings > System > General.
Configuration
To add the Time & Date service to your Home Assistant instance, use this My button:

If the above My button doesn’t work, you can also perform the following steps manually:
-
Browse to your Home Assistant instance.
-
In the bottom right corner, select the
Add Integration button. -
From the list, select Time & Date.
-
Follow the instructions on screen to complete the setup.
Configuration options
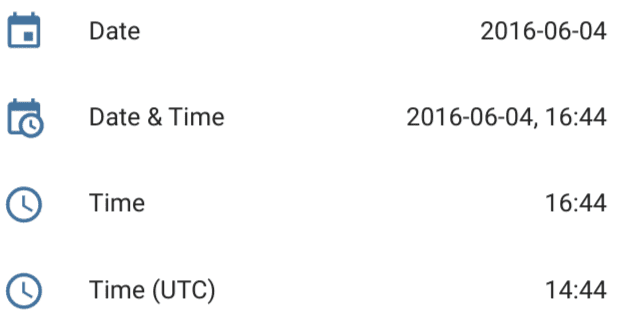
During setup, select the sensor type. The integration creates one sensor in the selected format.
The available options are:
-
Time: The current local time, for example,
14:30. -
Date: The current date, for example,
2026-04-12. -
Date & Time: The current date and time, for example,
2026-04-12, 14:30. -
Date & Time (UTC): The current date and time in UTC, for example,
2026-04-12, 12:30. -
Date & Time (ISO): The current date and time in ISO 8601 format, for example,
2026-04-12T14:30:00. -
Time & Date: The current time and date (reversed order), for example,
14:30, 2026-04-12. -
Time (UTC): The current time in UTC, for example,
12:30.
Supported functionality
The Time & Date integration provides the following entity.
Sensor
Depending on the sensor type selected during configuration, one of the following sensors is available.
-
Time
-
Description: The current local time, in the format
HH:MM.
-
Description: The current local time, in the format
-
Date
-
Description: The current date, in the format
YYYY-MM-DD.
-
Description: The current date, in the format
-
Date & Time
-
Description: The current date and time, in the format
YYYY-MM-DD, HH:MM.
-
Description: The current date and time, in the format
-
Date & Time (UTC)
-
Description: The current date and time in UTC, in the format
YYYY-MM-DD, HH:MM.
-
Description: The current date and time in UTC, in the format
-
Date & Time (ISO)
-
Description: The current date and time, in the ISO 8601 format
YYYY-MM-DDTHH:MM:SS.
-
Description: The current date and time, in the ISO 8601 format
-
Time & Date
-
Description: The current time and date (reversed order), in the format
HH:MM, YYYY-MM-DD.
-
Description: The current time and date (reversed order), in the format
-
Time (UTC)
-
Description: The current time in UTC, in the format
HH:MM.
-
Description: The current time in UTC, in the format
You can display the data of the sensor entity in a dashboard view by following the instructions on how to add a card from a view.
Data updates
Sensors that include the time update every minute. The date-only sensor updates each day at midnight.
Creating a custom time and date sensor
If you want a sensor with a custom date or time format, you can create a template sensor in your configuration.yamlThe configuration.yaml file is the main configuration file for Home Assistant. It lists the integrations to be loaded and their specific configurations. In some cases, the configuration needs to be edited manually directly in the configuration.yaml file. Most integrations can be configured in the UI. [Learn more] file. The example below uses the sensor created using the Date & Time (ISO) sensor type as the source and reformats it with timestamp_custom() using standard Python datetime formatting.
Add the following to your configuration.yamlThe configuration.yaml file is the main configuration file for Home Assistant. It lists the integrations to be loaded and their specific configurations. In some cases, the configuration needs to be edited manually directly in the configuration.yaml file. Most integrations can be configured in the UI. [Learn more]:
After changing the configuration.yamlThe configuration.yaml file is the main configuration file for Home Assistant. It lists the integrations to be loaded and their specific configurations. In some cases, the configuration needs to be edited manually directly in the configuration.yaml file. Most integrations can be configured in the UI. [Learn more] file, restart Home Assistant to apply the changes.
template:
  - sensor:
      - name: "Date and time"
        state: >
          {{
            as_timestamp(states('sensor.date_time_iso'))
            | timestamp_custom('%A %B %-d, %I:%M %p')
          }}
        icon: "mdi:calendar-clock"
This requires the Date & Time (ISO) sensor type to be set up in this integration.
More time-related resources
For more information about using time related variables and sensors in templates, see the template function reference for today_at, now, and as_timestamp.