Velbus
The Velbus integrationIntegrations connect and integrate Home Assistant with your devices, services, and more. [Learn more] is used to control Velbus modules. It supports the Velbus USB, Velbus serial and a TCP/IP gateway.
To use the Velbus integration, you need to have Velbus modules connected to a Velbus USB or TCP/IP interface.
Configuration
To add the Velbus hub to your Home Assistant instance, use this My button:

If the above My button doesn’t work, you can also perform the following steps manually:
-
Browse to your Home Assistant instance.
-
In the bottom right corner, select the
Add Integration button. -
From the list, select Velbus.
-
Follow the instructions on screen to complete the setup.
Configuration parameters
During the setup you will be shown 2 choices on ways to connect to the Velbus bus:
- USB
- TCP/IP
A connection test will be performed to ensure the connection is working. If successful, the integration will be added to Home Assistant.
USB
The USB connection is a way to connect to the Velbus bus. You will need a Velbus USB interface to connect to the bus. The USB interface is connected to the USB port of your Home Assistant device. The interface USB devices are automatically detected and shown in a list. Select the correct USB interface from the list and select Submit.
There will be a connection test to make sure the connection is working, and if it’s working the integration will be added to Home Assistant.
TCP/IP
The TCP/IP connection is a way to connect to the Velbus bus. You will need a Velbus TCP/IP interface available in your network.
Enable TLS connection towards the Velbus TCP/IP interface. This is usually needed when connecting to a signum. This is optional and can be disabled when connecting to a velser or Home Assistant add-on.
Example: signum
- tls: yes
- host: your signum IP address
- port: 27015
- password: your signum password (if configured)
Example: velser
- tls: no
- host: your velser IP address
- port: 6000
- password: leave empty
Example: Home Assistant add-on
- tls: depending on your configuration
- host: your Home Assistant IP address
- port: 27015 if you kept the default
- password: leave empty
Supported functionality
The Velbus integration supports the following functionality:
Switch
Every relay module will be represented as a switch entity in Home Assistant. You can turn the switch on and off to control the relay.
Light
Every dimmer module will be represented as a light entity in Home Assistant. You can turn the light on and off and set the brightness level. For each input module, a light entity will be created to control the LED of the push buttons. You can turn the LED on and off and set the flash mode.
The pushbutton LEDs of input modules are disabled by default. These can be enabled from the Devices panel in the Configuration page of the web interface.
Binary sensor
Every input module will be represented as a binary sensor entity in Home Assistant. The binary sensor will be on when the input is active and off when the input is inactive.
Select
Every module that supports programs will have a select entity in Home Assistant. You can select the program that you want to activate.
Climate
Every module that supports thermostat functionality will be represented as a climate entity in Home Assistant. You can set the target temperature, the mode (heat/cool) and the preset mode (away/comfort/eco/home).
Cover
Every blind module will be represented as a cover entity in Home Assistant. You can open and close the blind and if the module supports it, you can set the position of the blind.
Button
Every input module will have a button entity in Home Assistant to trigger a button press event. This can be used to trigger Velbus actions from Home Assistant.
Sensor
Some modules expose sensors that can be used in Home Assistant. Known and implemented sensors are:
- energy consumption sensor: kWh
- temperature sensor: °C
- light level sensor: Lux
- PSU voltage sensor: Voltage
- PSU current sensor: Amps
- PSU load sensor: Percentage
The Analog input module (VMB4AN) will have 4 sensor entities to read the analog values. The VMBMETEO module will have multiple sensor entities to read temperature, humidity, wind speed, wind direction, and rain level.
VLP file import
This step is optional.
In the next step of the configuration, you have the option to import a Velbus VLP configuration file. This is the configuration file that you can export from the VelbusLink software. This will eliminate the need for a scan of the bus and will create all devices and entities based on the configuration file.
If you don’t have a VLP file or don’t want to import it, you can skip this step, and the integration will perform a scan of the bus to discover the connected modules, but this is known to be less reliable than using a VLP file.
Re-configuring the integration
You can re-configure the Velbus integration by following these steps:
Options
To define options for Velbus, follow these steps:
-
In Home Assistant, go to Settings > Devices & services.
-
If multiple instances of Velbus are configured, choose the instance you want to configure.
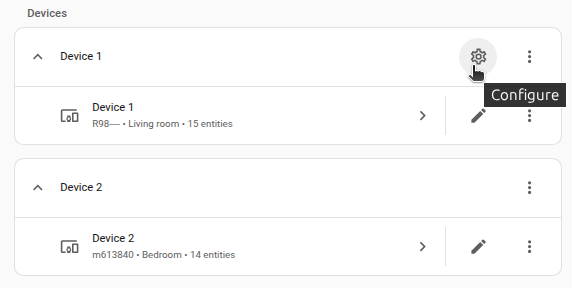
-
On the card, select the cogwheel
. - If the card does not have a cogwheel, the integration does not support options for this device.
-
Edit the options, then select Submit to save the changes.
List of actions
The Velbus integrationIntegrations connect and integrate Home Assistant with your devices, services, and more. [Learn more] provides the following actions. Each link below opens a dedicated page with examples, parameters, and a step-by-step UI walkthrough.
-
Clear cache (
velbus.clear_cache) Clears the Velbus cache and starts a new scan. -
Scan (
velbus.scan) Scans the Velbus modules on the bus. -
Set memo text (
velbus.set_memo_text) Shows memo text on the display of Velbus modules. -
Sync clock (
velbus.sync_clock) Synchronizes the clock of the Velbus modules to the Home Assistant clock.
For an overview of every action across all integrations, see the actions reference.
Examples
Linking a Velbus button to another entity
The Velbus integrationIntegrations connect and integrate Home Assistant with your devices, services, and more. [Learn more] allows you to link a Velbus button (such as a button of a VMBGPOD module) to a controllable entityAn entity represents a sensor, actor, or function in Home Assistant. Entities are used to monitor physical properties or to control other entities. An entity is usually part of a device or a service. [Learn more] of Home Assistant. The actual linking can be realized by two automation rules. One rule to control the device using the push button and a second rule to update the LED state of the push button as soon as the entityAn entity represents a sensor, actor, or function in Home Assistant. Entities are used to monitor physical properties or to control other entities. An entity is usually part of a device or a service. [Learn more] state changes.
# Control light living from Velbus push_button_10
- alias: "Control light living using Velbus push_button_10"
  triggers:
    - trigger: state
      entity_id: binary_sensor.push_button_10
      to: "on"
  actions:
    - action: light.toggle
      entity_id: light.living


# Keep status LED push_button_10 in sync to status light living
- alias: "Update LED state of push_button_10"
  triggers:
    - trigger: state
      entity_id: light.living
      to: "on"
    - trigger: state
      entity_id: light.living
      to: "off"
  conditions:
    - condition: or
      conditions:
        - condition: and
          conditions:
          - condition: state
            entity_id: light.led_push_button_10
            state: "on"
          - condition: state
            entity_id: light.living
            state: "off"
        - condition: and
          conditions:
            - condition: state
              entity_id: light.led_push_button_10
              state: "off"
            - condition: state
              entity_id: light.living
              state: "on"
  actions:
    - action: light.toggle
      entity_id: light.led_push_button_10
VMB7IN and the Energy dashboard
The VMB7IN sensor can be integrated with Home Assistant’s Energy dashboard to track your utility consumption.
In some cases, the VMB7IN sensor does not report what the counter is counting. If the counter is related to an energy device, everything will work out of the box.
But if the VMB7IN sensor is a water or gas counter, you will need to specify this in your configuration.yamlThe configuration.yaml file is the main configuration file for Home Assistant. It lists the integrations to be loaded and their specific configurations. In some cases, the configuration needs to be edited manually directly in the configuration.yaml file. Most integrations can be configured in the UI. [Learn more] file.
homeassistant:
  customize:
    sensor.eau_counter:
      device_class: water
The device_class attribute can have 2 values:
- gas: if the counter represents a gas meter
- water: if the counter represents a water meter
Data updates
The integration is event driven, meaning that updates are pushed from the Velbus modules to Home Assistant as soon as a change occurs. This ensures that the state of the entities in Home Assistant is always up to date.
For sensor entities, Velbus modules send periodic updates. The interval of these updates is configurable via VelbusLink software.
Known limitations
- The integration will never reprogram Velbus modules. All changes that are not implemented in the Velbus module protocol need to be done via VelbusLink software.
- The integration does not support upgrading Velbus modules firmware. This needs to be done via VelbusLink software.
- For relay modules, the integration does not support the forced on/off state. This needs to be done via VelbusLink software.
Troubleshooting
If you encounter issues with the Velbus integration, you can enable debug logging to get more information about the problem.
Common issues
- If you have changed the configuration of your Velbus modules using VelbusLink software, you may need to clear the Velbus cache using the
velbus.clear_cacheaction to ensure that Home Assistant has the latest configuration. - If you use the VLP file configuration for the integration, ensure that the VLP file is up to date and matches the configuration of your Velbus modules.
Enabling debug logging
To enable debug logging for the Velbus integration, you can check Home Assistant Troubleshooting documentation for more information.
Can’t connect to Velbus interface
Symptom: “Unable to setup Velbus”
This error indicates that Home Assistant is unable to connect to the Velbus interface.
Resolution
Try the following steps:
- For USB connections:
- Make sure the Velbus USB interface is properly connected to the Home Assistant device.
- Make sure no other application (like VelbusLink) is using the Velbus USB interface at the same time.
- For TCP/IP connections:
- Make sure the Velbus TCP/IP interface is powered on and connected to the network.
- Make sure the IP address and the port number are correct.
- Make sure the firewall or network security settings are not blocking the connection to the Velbus TCP/IP interface
Module not detected
Symptom: “Certain modules are not detected by the integration”
This issue indicates that some Velbus modules are not detected by the Velbus integration.
Description
This is likely caused by one of the following issues:
- The Velbus modules are not properly connected to the Velbus bus.
- The Velbus modules are not powered on.
- The Velbus bus scan has not been performed after adding new modules.
- The Velbus modules are not detected by the VelbusLink software.
- There are error messages in the Velbus integration debug logs related to module detection.
Resolution
- Check if Velbuslink software detects all modules correctly.
- If the Velbuslink software detects all modules, but they do not show in Home Assistant, file a bug report including debug logs, diagnostics, and your VLP file.
Supported devices
The Velbus integration supports a wide range of Velbus modules. A non-exhaustive list of supported modules is given below:
- VMB1RYNOS
- VMBPIRM
- VMBPIRC
- VMBPIRO
- VMBGP4PIR
- VMB1BLS
- VMBDMI-R
- VMBMETEO
- VMB4AN
- VMBEL1
- VMBEL2
- VMBEL4
- VMBELO
- VMBELPIR
- VMBGP1-2
- VMBGP2-2
- VMBGP4-2
- VMBGPOD-2
- VMBGP4PIR-2
- VMB1RYS
- VMBIN
- VMB4PB
- VMBDALI
- VMB4RYLD-10
- VMB4RYNO-10
- VMB2BLE-10
- VMB8DC-20
- VMB6PB-20
- VMBPIR-20
- VMB8IN-20
- VMBEL1-20
- VMBEL2-20
- VMBEL4-20
- VMBELO-20
- VMBGP1-20
- VMBGP2-20
- VMBGP4-20
- VMBGPO-20
- VMBPIRO-20
- VMBDALI-20
- VMBEL4PIR-20
- VMBGP4PIR-20
- VMB2BLE-20
Unsupported devices
The following Velbus modules are currently not supported by the integration:
- VMBRF8S
- VMBVP01
- VMBCM3
- VMBUSBIP
- VMBKP
- VMBSIG
- VMBSIG-20
- VMBSIG-21
Use cases
- Keep long term statistics of the Velbus sensor data using Home Assistant’s built-in recorder and history features.
- Create automations to control your Velbus devices based on time, state changes, or other sensor data.
- Integrate Velbus devices with other smart home devices and services supported by Home Assistant.
- Use voice assistants like Google Assistant or Amazon Alexa to control your Velbus devices via Home Assistant.
- Create custom dashboards in Home Assistant to monitor and control your Velbus devices.
- Use Home Assistant’s energy management features to monitor and optimize energy consumption using Velbus energy sensors.
- Link Velbus buttons to other Home Assistant entities for seamless control.
- Automate climate control using Velbus thermostat modules integrated with Home Assistant.
- Monitor environmental conditions using Velbus weather modules and create automations based on sensor readings.
- Set up notifications for specific events, such as when a Velbus sensor detects motion or when a door is opened.
Removing the integration
The Velbus integration and its entities can be removed by following these steps:
To remove an integration instance from Home Assistant
- Go to Settings > Devices & services and select the integration card.
- From the list of devices, select the integration instance you want to remove.
- Next to the entry, select the three dots
menu. Then, select Delete.
Note: Removing the integration will delete all Velbus devices and their history from Home Assistant.