iRobot Roomba and Braava
The Roomba integrationsIntegrations connect and integrate Home Assistant with your devices, services, and more. [Learn more] allows you to control your iRobot Roomba

This integrationsIntegrations connect and integrate Home Assistant with your devices, services, and more. [Learn more] has been tested and confirmed to be working with the iRobot Roomba s9+, Roomba 980, Roomba 960, Roomba 890, and Braava jet m6 models, but should also work fine with any of the older Wi-Fi enabled Roomba or Braava like the 690. It currently does NOT work with the newer x05 Wi-Fi models, such as Roomba 105, 405, and 505. For auto-discovery, you will need to initiate a Roomba reboot. For example, by holding the clean button for up to 20 seconds on an i7 or 980. More information about rebooting your robot
Configuration
To add the iRobot Roomba and Braava integration to your Home Assistant instance, use this My button:
iRobot Roomba and Braava can be auto-discovered by Home Assistant. If an instance was found, it will be shown as Discovered. You can then set it up right away.
If it wasn’t discovered automatically, don’t worry! You can set up a manual integration entry:
-
Browse to your Home Assistant instance.
-
In the bottom right corner, select the
Add Integration button. -
From the list, select iRobot Roomba and Braava.
-
Follow the instructions on screen to complete the setup.
The Roomba’s MQTT server only allows a single connection. Continuous mode is enabled by default, which will force the App to connect via the cloud to your Roomba. Continuous mode can be disabled in the configuration options for the integration after it is added. For more information, refer to the Roomba 980 repository
Integration entities
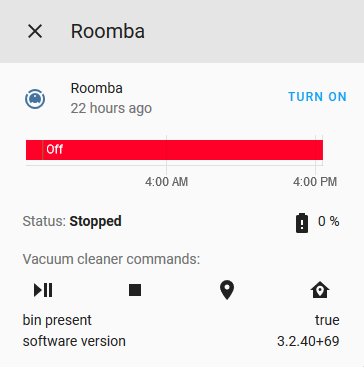
The Roomba integrationsIntegrations connect and integrate Home Assistant with your devices, services, and more. [Learn more] will add the following sensors.
Sensors:
- Battery: The status of your battery
- Bin full (if Roomba has the capacity to do): If the bin is full
- Canceled missions: Total number of missions that have been canceled
- Failed missions: Total number of missions that have failed
- Successful missions: Total number of successful missions
- Average mission time: The amount of time a mission took on average
- Total missions: The total number of all missions
- Scrubs: Total number of times the robot has executed a “scrub”
- Total cleaning time: How many hours the robot has spent cleaning in total
- Total cleaned area: The total area in m² the robot has cleaned
Retrieving your credentials
Check if the credentials can be retrieved directly from your device:
- Make sure the Roomba app is closed on all of your devices.
- Follow the instructions in Home Assistant to retrieve the credentials.
If automatic retrieval does not work, you can retrieve the credentials manually. To manually retrieve both the BLID (username) and the password, refer to the instructions in the Roomba 980
For Home Assistant Container, the following command retrieves the BLID (username) and password:
docker exec -it CONTAINER_NAME_OR_ID python -c 'import roombapy.entry_points; roombapy.entry_points.password()' ROOMBA_IP
Retrieving credentials from the cloud with dorita980
The underlying Python library is currently unable to retrieve the credentials from some newer models (for example, the J7). See this issue
Found 1 robot(s)!
Robot "RoombaJ7" (sku: j715800 SoftwareVer: sapphire+22.21.1+2022-06-02-570490a425b+Firmware-Production+70):
BLID=> XXXXXXXXXXXXXXXXXXXXXXXXXXXXXXXX
Password=> XXXXXXXXXXXXXXXXXXXXXXXXXXXXX <= Yes, all this string.

Use this credentials in dorita980 lib :)
Copy the password (everything between => and <=, not including leading and trailing whitespace) into the Home Assistant password dialog.
Troubleshooting
-
Integration wizard shows “Failed to connect” after submitting the password: Before attempting a factory reset (which can be a cumbersome process), attempt submitting the password in the integration wizard while the Roomba is actively running (i.e. cleaning). Avoid opening the app to start a manual job to help with this. Instead, push the physical clean button on the device directly to start the manual job. This appears to resolve the issue on some models because they answer queries only while actively running.
If this still does not resolve the issue, factory reset the model.