Reolink
The Reolink integrationIntegrations connect and integrate Home Assistant with your devices, services, and more. [Learn more] allows you to control Reolink NVRs or cameras. Reolink cameras are known for their local storage, without the need for a cloud subscription or account. Reolink cameras can operate fully locally on your network, putting privacy first. When blocking internet access for the Reolink devices, the Home Assistant integration, as well as the Reolink app/client, will continue to work as usual. Reolink cameras provide excellent day- and nighttime video clarity at an affordable price. An SD card in the camera offers local recording, while an optional Reolink NVR/Hub can offer a large recording capacity indoors. As evident by the list of entities in this documentation, Reolink cameras are highly configurable and tightly integrated into Home Assistant.
This integration is officially authorized by Reolink, with @StarkillerOG as the main developer, and it is built with the support of Reolink’s official resources.
Prerequisites
A brand new Reolink camera needs to be connected to the network and initialized. During initialization, the camera’s credentials need to be set. Refer to the Initial setup section for detailed instructions.
- On the Reolink device, a user account with admin privileges is needed for the proper operation of this integration.
- The password used for the Reolink device can only contain characters
a-z, A-Z, 0-9 or @$*~_-+=!?.,:;'()[]. Other special characters will cause encoding issues in the video streams used by this integration and are, therefore, not allowed. When using an incompatible special character in the password, the integration will prompt you to change the password.
Configuration
To add the Reolink hub to your Home Assistant instance, use this My button:

Reolink can be auto-discovered by Home Assistant. If an instance was found, it will be shown as Discovered. You can then set it up right away.
If it wasn’t discovered automatically, don’t worry! You can set up a manual integration entry:
-
Browse to your Home Assistant instance.
-
In the bottom right corner, select the
Add Integration button. -
From the list, select Reolink.
-
Follow the instructions on screen to complete the setup.
The hostname or IP address of your Reolink device. For example: ‘192.168.1.25’. You can find it in your router or in the Reolink app under Settings > Device (top icon) > Networkinformation > IP-address. Normally, the Reolink device is automatically discovered, and you do not need to provide this.
Options
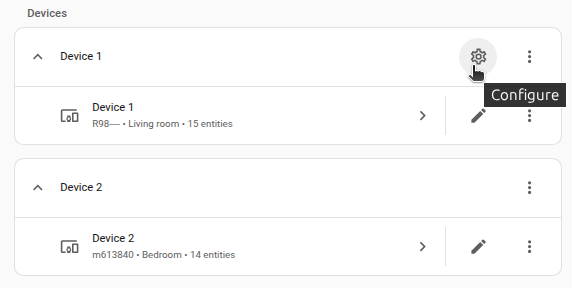
To define options for Reolink, follow these steps:
-
In Home Assistant, go to Settings > Devices & services.
-
If multiple instances of Reolink are configured, choose the instance you want to configure.
-
On the card, select the cogwheel
. - If the card does not have a cogwheel, the integration does not support options for this device.
-
Edit the options, then select Submit to save the changes.
Asterisk (*) next to entities listed in this documentation
If an entity listed below has an asterisk (*) next to its name, it means it is disabled by default. To use such an entity, you must enable the entity first.
Data updates: plus (+) next to entities listed in this documentation
If an entity listed below has a plus (+) next to its name, it means this entity supports push updates. These entities will have almost instant state changes. For redundancy, the state of all entities is also polled. For cameras connected to a NVR/Hub, the polling interval is 10 seconds per camera, with a minimum of 60 seconds total. For directly connected cameras, the polling interval is 60 seconds. For entities without a plus (+), polling is the only update method. Therefore, a device’s state change can take some time to be reflected in Home Assistant. An exception is the firmware update entity, which is polled every 24 hours. Another exception are battery cameras, most entitiesAn entity represents a sensor, actor, or function in Home Assistant. Entities are used to monitor physical properties or to control other entities. An entity is usually part of a device or a service. [Learn more] are still pollsData polling is the process of querying a device or service at regular intervals to check for updates or retrieve data. By defining a custom polling interval, you can control how frequently your system checks for new data, which can help optimize performance and reduce unnecessary network traffic. [Learn more] every 60 seconds. However, the entities that would cause the camera to wake from sleep will only be polled during the following events:
- The camera wakes by itself (PIR event) and the last update was more than 1 hour ago.
- The camera did not wake for more than 6 hours.
- All battery cameras have not been awake at the same time for more than 12 hours.
A full update of all entities, which will wake all battery cameras connected to the same hub/NVR, can be performed by calling the homeassistant.update_entity action on a single Reolink entity of a camera (for example the motion detection binary sensor).
Supported functionality
Camera streams
This integration creates a few camera entities, one for each stream type with different resolutions:
- Fluent (Low resolution)
- Balanced* (Mid resolution)
- Clear* (High resolution, resource intensive)
- Snapshots Fluent* (Low resolution)
- Snapshots Clear* (High resolution)
The Fluent stream camera entity is enabled by default; the other streams are disabled by default. The Snapshots stream provides a sequence of image snapshots giving very low latency at the cost of a very low frame rate; this can be used when the RTMP/RTSP/FLV video stream has too much lag. Dual lens cameras provide additional streams for the second lens.
Binary sensors
Depending on the supported features of the camera (see specifications of the camera model on Reolink.com), binary sensors are added for:
- Motion detection++
- Visitor++ (Doorbell presses)
- AI person detection++
- AI vehicle detection++
- AI bicycle detection+
- AI pet detection++
- AI animal detection++
- AI face detection++
- AI package detection++
- AI baby crying detection+ (sound detection)
- AI crossline person+ (up to 3 lines)
- AI crossline vehicle+ (up to 3 lines)
- AI crossline animal+ (up to 3 lines)
- AI intrusion person+ (up to 3 zones)
- AI intrusion vehicle+ (up to 3 zones)
- AI intrusion animal+ (up to 3 zones)
- AI linger person+ (up to 3 zones)
- AI linger vehicle+ (up to 3 zones)
- AI linger animal+ (up to 3 zones)
- AI item forgotten+ (up to 3 zones)
- AI item taken+ (up to 3 zones)
- IO input+
- Sleep status+
++ These sensors receive events using the following 4 methods (in order): TCP push, ONVIF push, ONVIF long polling or fast polling (every 5 seconds). The latency for receiving the events is the best for TCP push and the worst for fast polling, the fastest available method that is detected to work will be used, and slower methods will not be used. For redundancy, these sensors are polled every 60 seconds together with the update of all other entities. To ensure you have the best latency possible, refer to the Reducing latency of motion events section.
For the crossline, intrusion, linger, item forgotten, and item taken entities, you first need to configure the lines/zones in the Reolink app (Settings > Detection alarm > Smart event detection). In the Reolink app, you can add up to 3 zones/lines, and for each zone/line, you can enable/disable the person/vehicle/animal detection. Within 60 seconds after making a change in the Reolink app, the corresponding entities will automatically show up in Home Assistant.
Number entities
Depending on the supported features of the camera (see specifications of the camera model on Reolink.com), number entities are added for:
- Optical zoom control+
- Focus control+
- Floodlight turn on brightness*+
- Floodlight event brightness*+
- Infrared light brightness
- Floodlight event on time*
- Floodlight event flash time*
- Volume (Camera)
- Volume speak (Camera)
- Volume doorbell (Camera)
- Alarm volume (Home Hub)
- Message volume (Home Hub)
- Chime volume
- Chime silent time
- Audio noise reduction*
- Guard return time
- Motion sensitivity
- PIR sensitivity
- PIR interval*
- AI face sensitivity
- AI person sensitivity
- AI vehicle sensitivity
- AI bicycle sensitivity
- AI package sensitivity
- AI pet sensitivity
- AI animal sensitivity
- AI crossline sensitivity+ (up to 3 lines)
- AI intrusion sensitivity+ (up to 3 zones)
- AI linger sensitivity+ (up to 3 zones)
- AI item forgotten sensitivity+ (up to 3 zones)
- AI item taken sensitivity+ (up to 3 zones)
- AI face delay*
- AI person delay*
- AI vehicle delay*
- AI bicycle delay*
- AI package delay*
- AI pet delay*
- AI animal delay*
- AI intrusion delay+ (up to 3 zones)
- AI linger delay+ (up to 3 zones)
- AI item forgotten delay+ (up to 3 zones)
- AI item taken delay+ (up to 3 zones)
- Baby cry sensitivity
- Auto quick reply time
- Auto track limit left
- Auto track limit right
- Auto track disappear time
- Auto track stop time
- Day night switch threshold*
- Image brightness*+ (default 128)
- Image contrast*+ (default 128)
- Image saturation*+ (default 128)
- Image sharpness*+ (default 128)
- Image hue*+ (default 128)
- Pre-recording time*
- Pre-recording stop battery level*
Floodlight turn on brightness controls the brightness of the floodlight when it is turned on internally by the camera (see Floodlight mode select entity) or when using the Floodlight light entity. Floodlight event brightness controls the brightness of the floodlight when it is turned on due to the camera detecting an event (for example, a person or vehicle), see the Floodlight event mode entity.
Floodlight event on time will be in the unknown state if Floodlight event mode is not in the on state.
Floodlight event flash time will be in the unknown state if Floodlight event mode is not in the flash state.
When the camera is not moved and no person/pet/animal/vehicle is detected for the Guard return time in seconds, and the Guard return switch is ON, the camera will move back to the guard position.
When a Reolink doorbell is pressed the quick reply message from the Auto quick reply message select entity will be played after Auto quick reply time seconds, unless the Auto quick reply message is set to off.
If the Auto tracking switch entity is enabled, and a object disappears from view OR stops moving for the Auto track disappear time/Auto track stop time, the camera goes back to its original position.
Day night switch threshold determines at which light level the camera switches from Color to Black & white. This value only applies if the Day night mode select is on Auto.
Button entities
Depending on the supported features of the camera (see specifications of the camera model on Reolink.com), button entities are added for:
- PTZ stop
- PTZ left
- PTZ right
- PTZ up
- PTZ down
- PTZ left up*
- PTZ left down*
- PTZ right up*
- PTZ right down*
- PTZ calibrate
- PTZ zoom in*
- PTZ zoom out*
- PTZ continuous rotation*
- Guard go to
- Guard set current position
- Restart*
PTZ left, right, up, down, left up, left down, right up, right down, zoom in and zoom out will continually move the camera in the respective position until the PTZ stop is called or the hardware limit is reached. PTZ continuous rotation will keep rotating the camera until PTZ stop is called or PTZ continuous rotation is called again.
Guard set current position will set the current position as the new guard position.
Some Reolink PTZ cameras can move at different speeds. For those cameras, the PTZ move action works in combination with the PTZ left, right, up, down, zoom in, or zoom out button entities, which let you specify the speed. If those button entities are not shown when you choose a target for the action, that camera does not support custom PTZ speeds.
Select entities
Depending on the supported features of the camera (see specifications of the camera model on Reolink.com), select entities are added for:
- Floodlight mode (Off, Auto, On at night, Schedule, Adaptive, Auto adaptive)
- Floodlight event mode (Off, On, Flash)
- Day night mode+ (Auto, Color, Black&White)
- PTZ preset
- Play quick reply message
- Auto quick reply message
- Auto track method (Digital, Digital first, Pan/Tilt first)
- Doorbell LED (Stay off, Auto, Auto & always on at night)
- HDR* (Off, On, Auto)
- Binning mode* (Off, On, Auto)
- Image exposure mode* (Auto, Low noise, Anti-smearing, Manual)
- Clear frame rate*
- Fluent frame rate*
- Clear bit rate*
- Fluent bit rate*
- Chime motion ringtone
- Chime person ringtone
- Chime pet ringtone
- Chime vehicle ringtone
- Chime visitor ringtone
- Hub alarm ringtone
- Hub visitor ringtone
- Hub scene mode (Off, Disarmed, Home, Away)
- Recording packing time
- Pre-recording frame rate*
- Post-recording time
- Clear encoding* (h264, h265)
- Fluent encoding* (h264, h265)
PTZ preset positions can be set in the Reolink app/windows/web client, the names of the presets will be loaded into Home Assistant at the start of the integration. When adding new preset positions, please restart the Reolink integration.
Play quick reply messages/Auto quick reply messages can be recorded in the Reolink phone app where a name is also supplied. New or updated quick reply messages will be loaded into Home Assistant at the start of the integration. When adding new quick reply messages, please restart the Reolink integration.
Hub scene modes can be set in the Reolink app/client. The scene names are loaded into Home Assistant at the start of the integration. After adding new custom scenes, restart the Reolink integration.
To play a ringtone on a Reolink Chime, use the Play chime action.
Siren entities
If the camera or hub supports a siren, a siren entity will be created. When using the siren turn-on action, the siren will continue to sound until the siren turn-off action is called.
In some camera models, there is a delay of up to 5 seconds between the turn-off command and the sound stopping. The siren turn-on action supports setting a volume and a duration (no turn-off action call is needed in that case).
Switch entities
Depending on the supported features of the camera (see specifications of the camera model on Reolink.com), switch entities are added for:
- Infrared lights in night mode
- Record audio
- Siren on event
- Auto tracking
- Auto focus
- Guard return
- PTZ patrol (start/stop)
- Doorbell button sound
- Record
- Manual record+
- Pre-recording
- Surveillance rule
- Privacy mode+
- Privacy mask
- Push notifications
- Hub ringtone on event
- Email on event
- FTP upload
- PIR enabled*
- PIR reduce false alarm*
- Chime LED
- Hardwired chime enabled*
When the Privacy mode is ON, almost all other entities will be unavailable because the camera shuts down the API and camera streams. When turning OFF the Privacy mode, all entities will become available again. Take this into consideration when making automations; ensure the Privacy mode is OFF before changing camera settings using other entities.
The Privacy mask switch will only be added when the privacy mask is configured in the Reolink app/client under settings (gear icon) > Display > Privacy Mask. After adding the privacy mask, the reolink integration in Home Assistant needs to be reloaded for the Privacy mask switch to show up.
When the Infrared lights in night mode entity is set to OFF, the infrared LEDs are always OFF. When the Infrared lights in night mode entity is set to ON, the infrared LEDs will be on when the camera is in night vision mode. For more information, see the Day night mode select entity.
For NVRs, a global switch for Record, Push, Hub ringtone on event, Email, and FTP will be available under the NVR device as well as a switch per channel of the NVR under the camera device. The respective feature will only be active for a given channel if both the global and that channel switch are enabled (as is also the case in the Reolink app/client).
Push notifications to a phone will only be provided if the following conditions are met:
- The Push notifications switch in Home Assistant is ON.
- For NVRs, both the global and channel switch are ON.
- The Push-notification in the Reolink App of that phone is ON.
The Push-notification in the Reolink app is independent of the Home Assistant setting. It is also independent of the settings on other phones connected to the same camera. Reolink does this so you have an independent way of turning off push notifications per phone.
The PTZ patrol positions first need to be configured using the Reolink app/windows/web client. When no positions are configured, the PTZ patrol entity will not be added. When adding patrol positions for the first time, you need to restart the Reolink integration.
The Manual record switch will turn off automatically after 10 minutes. Therefore the recording will end as soon as the manual record switch is turned off, or 10 minutes have passed.
Polling the status of the Hardwired chime enabled switch can make the hardwired chime rattle a bit depending on the model of the chime. Therefore the status of this switch is only polled one time (about 1 minute after the integration starts). The rattle at startup can only happen if you chose to enable this switch.
Light entities
Depending on the supported features of the camera (see specifications of the camera model on Reolink.com), light entities are added for:
- Floodlight+
- Status LED
When the floodlight entity is ON always ON, when OFF controlled based on the internal camera floodlight mode (Off, Auto, Schedule), see the Floodlight mode select entity.
Sensor entities
Depending on the supported features of the camera (see specifications of the camera model on Reolink.com), the following sensor entities are added:
- Person type+ (man, woman)
- Animal type+ (dog, cat)
- Vehicle type+ (sedan, SUV, pickup truck, motorcycle)
- PTZ pan position+
- PTZ tilt position+
- Day night state+ (color, black and white, color with floodlight)
- Wi-Fi signal*
- CPU usage*
- HDD/SD storage*
- Battery percentage+
- Battery temperature*+
- Battery state*+ (discharging, charging, charge complete)
Update entity
An update entity is available that checks for firmware updates every 24 hours. Updates are checked both through the camera API and directly from the Reolink download center. Therefore the update entity in Home Assistant can find and install a firmware update from the Reolink download center while the Reolink app/windows/web client does not always find this update.
Media browser for playback of recordings
If the camera supports recording to an SD card or NVR/Hub (see specifications of the camera model on Reolink.com), the Reolink integration will provide a media browser through which recorded videos of the camera can be accessed. In the sidebar, select “Media” > “Reolink” and select the camera of which you want to see recordings. Optionally, select if you want a high or low resolution stream and select the recording date. Here, all available video files of that day will be shown. Recordings up to 1 month old can be viewed in Home Assistant.
List of actions
The Reolink integrationIntegrations connect and integrate Home Assistant with your devices, services, and more. [Learn more] provides the following actions. Each link below opens a dedicated page with examples, parameters, and a step-by-step UI walkthrough.
-
Play chime (
reolink.play_chime) Plays a ringtone on a Reolink Chime. -
PTZ move (
reolink.ptz_move) Moves a Reolink camera at a specific speed.
For an overview of every action across all integrations, see the actions reference.
Tested models
Models marked as bold in the lists below have been certified under the Works with Home Assistant program.
Tested directly connected models
The following models have been tested and confirmed to work with a direct link to Home Assistant:
- C1 Pro*
- C2 Pro*
- CX410
- CX810
- E1 Pro
- E1 Zoom
- E1 Outdoor
- E1 Outdoor PoE
- E1 Outdoor Pro
- E331
- Elite Floodlight WiFi (needs mains power, cannot be integrated when powered through USB)
- FE-P (only “fisheye” or “5-in-1” view for the streams, not “dual panoramic”, “quad”, “cylindrical”, “defished”, or “hemispheric” view)
- FE-W (only “fisheye” or “5-in-1” view for the streams, not “dual panoramic”, “quad”, “cylindrical”, “defished”, or “hemispheric” view)
- Lumus Pro
- RLC-410*
- RLC-410W
- RLC-411*
- RLC-420*
- RLC-423*
- RLC-510A
- RLC-511*
- RLC-511W*
- RLC-511WA*
- RLC-520*
- RLC-520A
- RLC-522*
- RLC-810A
- RLC-810WA
- RLC-811A
- RLC-81MA
- RLC-81PA
- RLC-820A
- RLC-822A
- RLC-823A
- RLC-823S2
- RLC-830A
- RLC-833A
- RLC-840A
- RLC-843A
- RLC-1212A
- RLC-1224A
- RLN8-410 NVR
- RLN16-410 NVR
- RLN36 NVR
- RLN12W NVR
- NVS8 NVR (Retail version of RLN8)
- NVS16 NVR (Retail version of RLN16)
- RP-PCB8MZ
- Reolink Chime (when connected to a doorbell or Home Hub)
- Reolink Duo WiFi
- Reolink Duo 2 WiFi
- Reolink Duo 3 PoE
- Reolink Duo 3V PoE
- Reolink Duo Floodlight (PoE and Wi-Fi)
- Reolink Elite WiFi
- Reolink Floodlight PoE and Wi-Fi*
- Reolink Home Hub
- Reolink Home Hub Mini
- Reolink Home Hub Pro
- Reolink Lumus
- Reolink TrackMix PoE
- Reolink TrackMix Wi-Fi
- Reolink Video Doorbell (PoE Black, PoE White)
- Reolink Video Doorbell (Wi-Fi Black, Wi-Fi White)
*These models are discontinued and not sold anymore, they will continue to work with Home Assistant.
Tested battery-powered models
Battery-powered Reolink cameras can be used with Home Assistant with the help of a Reolink Home Hub or NVR. The Home Hub/NVR will act as a bridge between the battery-powered cameras and Home Assistant, conserving the battery life. All features of the battery-powered cameras will be available just like regular-powered cameras. Viewing the camera stream in Home Assistant will keep the battery camera awake during viewing, consuming battery life. Therefore, ensure you do not use the camera stream on a dashboard that is constantly being viewed, like a wall panel dashboard. You can check proper operation by ensuring that the “Sleep status” entity will go to “Sleeping” if the battery camera is not being actively used.
The following hubs/NVRs have been tested and confirmed to work with battery-powered models in Home Assistant:
- Reolink Home Hub
- Reolink Home Hub Mini
- Reolink Home Hub Pro
- RLN8-410 NVR (only hardware versions N7MB01, N3MB01, N2MB02, or H3MB18. Hardware versions H3MB02 and H3MB16 did not get firmware updates since 2022)
- RLN16-410 NVR (only hardware versions N6MB01 or H3MB18. Hardware version H3MB02 did not get firmware updates since 2022)
- RLN36 NVR
- NVS8 NVR (Retail version of RLN8)
- NVS16 NVR (Retail version of RLN16)
The following battery-powered models have been tested and confirmed to work through the Reolink Home Hub/NVR:
- Argus 3 Pro
- Argus 4 Pro
- Argus Eco
- Argus Eco Ultra
- Argus PT
- Argus Track
- Reolink Altas
- Reolink Altas PT Ultra
- Reolink Doorbell Battery
Reolink provides this larger list of battery camera models which are compatible with the Home Hub and should work with Home Assistant.
Models only compatible using a NVR/Home Hub
The following models are lacking the HTTP web server API and can, therefore, not work directly with this integration. However, these cameras can work with this integration through an NVR or Home Hub in which the NVR/Home Hub is connected to Home Assistant.
- B400*
- B500*
- B500W*
- B800*
- B800W*
- B1200*
- D400*
- D500*
- D800*
- D1200*
- E1
*These models are only sold as a kit which includes a NVR.
Incompatible models
Reolink LTE cameras do not work with this integration.
- Reolink Go Plus
- Reolink Go PT Plus
- Reolink Go PT Ultra
- Reolink Go Ranger PT
- Reolink Go Ultra
- Reolink TrackMix LTE
- Reolink TrackMix LTE Plus
Initial setup
1. Initializing and configuring camera credentials.
A brand new Reolink camera first needs to be connected to the network and initialized. During initialization, the credentials for the camera need to be set. There are several ways to achieve this:
Connecting Reolink via app/client
The recommended way is to use the Reolink mobile app, Windows, or Mac client, and follow the on-screen instructions.
Connecting Reolink via a web browser
When your camera has a LAN port (most Wi-Fi cameras also have a LAN port):
- First connect the camera to your network using a LAN cable.
- Find the IP address of the camera (for example by checking in your router) and go to the IP address in a web browser.
- Follow the on-screen instructions to first set up the credentials (use the same credentials in Home Assistant).
- If it is a Wi-Fi camera:
- Go to settings (gear icon) > Network and fill in your Wi-Fi SSID and password.
- If you have both a 2.4 GHz and 5 GHz network, check your camera’s user guide to see which operating frequency is supported.
- After that you can disconnect the LAN cable and the camera will automatically switch to the Wi-Fi connection.
- Go to settings (gear icon) > Network and fill in your Wi-Fi SSID and password.
QR code
You can also connect a Wi-Fi camera using a self-made QR code. Once connected, follow the instructions under Web browser. Create a QR code using ISO-8859-1 character encoding (not UTF-8) with the following XML string:
<QR><S>ssid</S><P>password</P><C>last4</C></QR>
Use the ssid and password of your Wi-Fi network.
The last4 are the last 4 digits of the QR code which is printed (on the underside) of the camera itself.
Normally, the digits are printed directly under the QR code. Alternatively, you could scan the QR code and grab the last 4 digits.
Then power up the camera while pointing it at the QR code. It takes about a minute to initialize, read the QR code, and connect to your Wi-Fi.
2. Add integration in Home Assistant
Set up the Reolink integration in Home Assistant using the credentials you set in step 1.
Removing the integration
Removing a directly connected camera/NVR/Home Hub
Removing a directly connected camera/NVR/Home Hub can be done by removing the integration following these steps:
- Go to Settings > Devices & services and select the integration card.
- From the list of devices, select the integration instance you want to remove.
- Next to the entry, select the three dots
menu. Then, select Delete.
This will also remove all cameras/chimes connected to the NVR/Home Hub from Home Assistant.
Removing a camera from a NVR/Home Hub
Removing a camera from a NVR/Home Hub can be done by deleting the device following these steps:
- First physically disconnect the ethernet cable of the camera from the NVR if the camera is directly connected to the NVR (PoE).
- Then remove the camera from the NVR/Home Hub following the NVR instructions or Home Hub instructions.
- Go to Settings > Devices & services and select the integration card.
- From the list of integration entries, select the x devices underneath the integration instance of the NVR/Home Hub from which you want to remove a camera.
- Select the camera you want to remove from the list of devices
- Underneath the Device info, select the three dots
menu. Then, select Delete.
Removing a chime
Removing a chime from a doorbell can be done by deleting the chime following these steps:
- Go to Settings > Devices & services and select the integration card.
- From the list of integration entries, select the x devices underneath the integration instance of the Doorbell/NVR/Home Hub from which you want to remove a chime.
- Select the chime you want to remove from the list of devices
- Underneath the Device info, select the three dots
menu. Then, select Delete.
This will also decouple the chime from the doorbell in the Reolink app/client. Therefore, the chime will no longer ring when the doorbell is pressed.
Examples
Showing the camera in the dashboard
One way to show the camera in the dashboard is by using the picture glance card. For example, you can place arrow buttons on the card to control the camera.
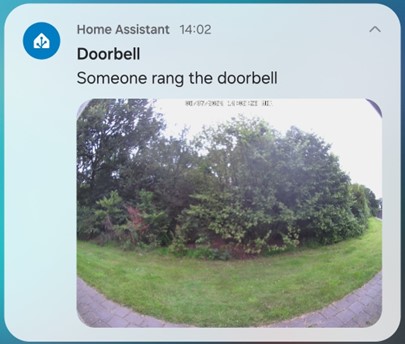
Sending rich notifications
You can receive rich notifications on your phone when someone rings a Reolink doorbell or a Reolink camera detects an event like motion or a person.
Prerequisites:
- This Reolink integration
- Android or iOS companion app
- Remote access to Home Assistant. Although you can receive text notifications without remote access, to see the camera image in the notification (rich notification), the phone needs to be able to reach Home Assistant. The rich notification will always work, even without remote access, when the phone is on the same network as Home Assistant.
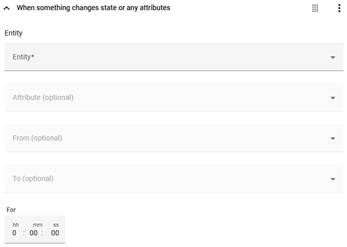
- To receive such a rich notification, we are going to make an automation in Home Assistant. In Home Assistant go to Settings > Automations & scenes and select Create automation > Create new automation.

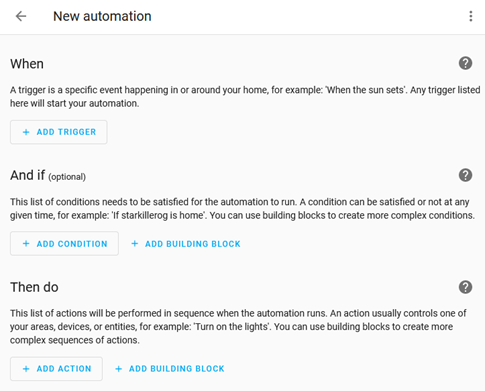
- Under When, select: Add trigger > Entity > State.
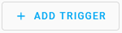


Then under Entity, select the binary sensor from the drop-down list corresponding to the camera event for which you want to receive a rich notification. For the Reolink integration the options are:
- binary_sensor.*camera name*_motion
- binary_sensor.*camera name*_person
- binary_sensor.*camera name*_vehicle
- binary_sensor.*camera name*_pet
- binary_sensor.*camera name*_animal
- binary_sensor.*camera name*_visitor (doorbell press)
- binary_sensor.*camera name*_package
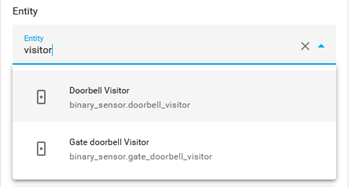
Note that these entity names will be translated into the language you configured Home Assistant in. You can type to search through all your entities. You can add multiple triggers if you want to send the same message for multiple camera events like person and vehicle detection. You can also create multiple automations with different messages for each event. In this case, we chose the visitor detection for doorbell presses:
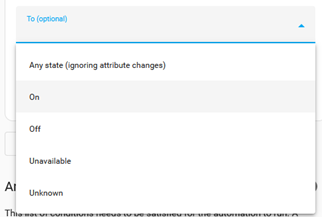
- Under To select the state in which the event is detected: for visitor On for the other sensors Detected:
- Under And if you can optionally limit when the notifications need to be sent.
-
For instance only when you are not home. The companion app will provide a device_tracker entity based on the GPS of your phone if you allow location tracking during the setup of the app. We will use this as an example but you can add as many conditions as you like:
Select + Add Condition > Entity > State. Then under Entity select the device_tracker entity of your phone and under State select Home.
![]()
-
If you want to limit the amount of notifications being sent using a cooldown time you can use the following template condition:
Select Add Condition again > Other conditions > Template. Then, under Value template, type the following:
{{as_timestamp(now()) - as_timestamp(state_attr('automation.reolink_push', 'last_triggered'), 0) > 30}}
The automation.reolink_push is the name of this automation, which will be set under step 7, and the 30 is the cooldown time in seconds.

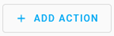
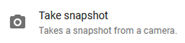
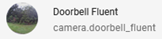
- Under Then do, select Add Action > Camera > Take snapshot.

Under Targets, select Choose entity and select the camera for which you want to add the image to the notification.
Under Filename, fill in /media/reolink_snapshot/last_snapshot_doorbell.jpg. The first part /media/ is absolutely necessary to allow your phone to access the saved image when it receives the notification. The reset of the folder and filename can be changed at will as long as you fill in the same filename under step 6.

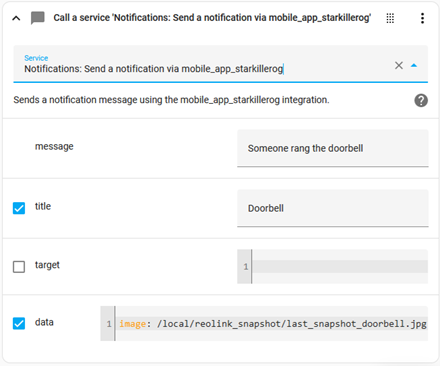
- Add another action underneath by selecting Add Action > Notifications > Send a notification via mobile_app_
.

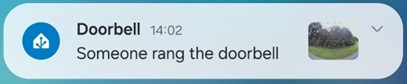
Under message, type the text you want to receive in the notification. For instance, “Someone rang the doorbell”.
If you want to give the notification a title, select the title option. For instance, if you have multiple cameras that send you notifications, select the camera name: Doorbell.
Select the data option and fill in image: /media/local/reolink_snapshot/last_snapshot_doorbell.jpg. Note that /media/ of the filename of step 5 now needs to be changed to /media/local/. The rest of the filename needs to be the same as in step 5.
You can personalize the notification further and even control what happens if you tap the notification on your phone, read more about this here.
- Select Save, give your automation a name like
doorbell notification, and select save again.

You are all set, ring your doorbell and see the notification on your phone. Remember the conditions under And if need to be met, otherwise you will not receive the notification.
Automation ideas
- Turn on (outdoor) lights near the camera to improve image clarity at night once the camera detects a person, vehicle, or animal.
- Turn off notifications and recording when you get home (based on, e.g., geofencing) and turn it back on when you leave home.
- Auto-pause rich notifications for x time
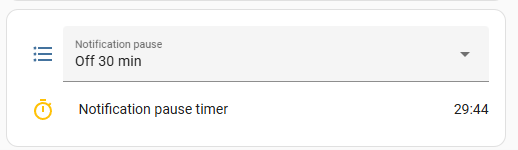
Goal: At the end of this tutorial, you will have a drop-down on your dashboard with different time choices to pause your notifications. When the time is up, the notifications will become active again. It will look like this:
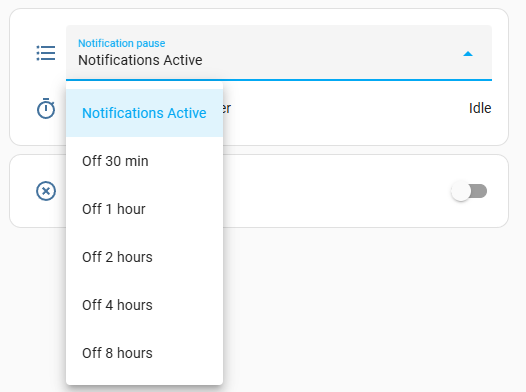
-
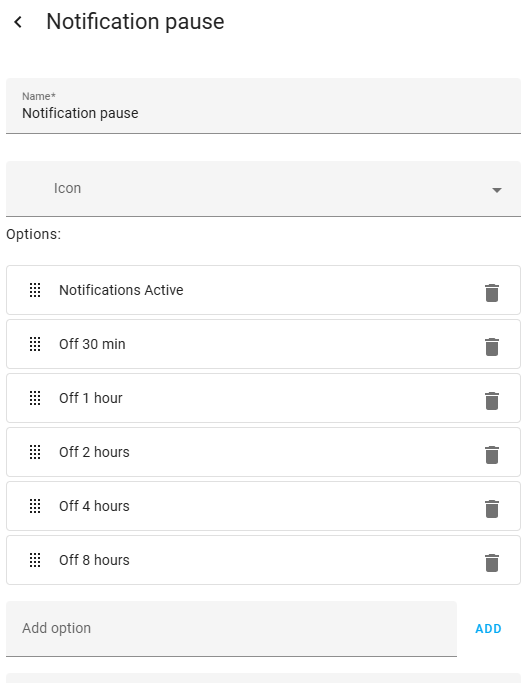
First, create the dropdown from Settings > Devices & services > Helpers > + Create Helper > Dropdown.
- Decide how many time delay choices you want.
- Add them all to the dropdown like below.
- Your first entry needs to be “Notifications active” (or simular phrasing) for when the notifications are turned on.
- You can define as many time options as you want. And you can define any time interval you like, for example, 22 minutes, 2 hours.
-
Next, also from the Helpers menu create a Timer.
-
Leave the time duration all zeros. Select the Restore state and time box.

-
-
Now you will create a new automation script.
- For the When select + Add Trigger > Entity > State and choose your dropdown box for the entity and in the From choose your “Notifications active” or whatever you chose for the top item.

-
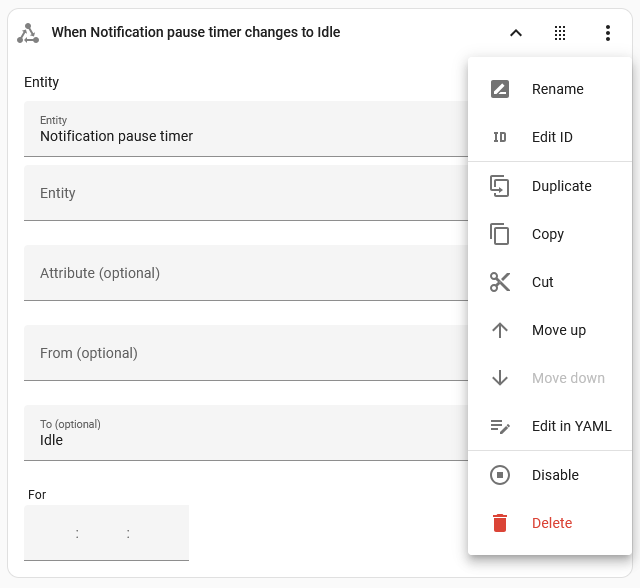
Add another trigger using + Add Trigger > Entity > State and choose your timer for the entity and in the To choose “Idle”.
- Now select the three dots
menu of this trigger and press Edit ID. In the Trigger ID type “TIMER DONE”.
- Now select the three dots
-
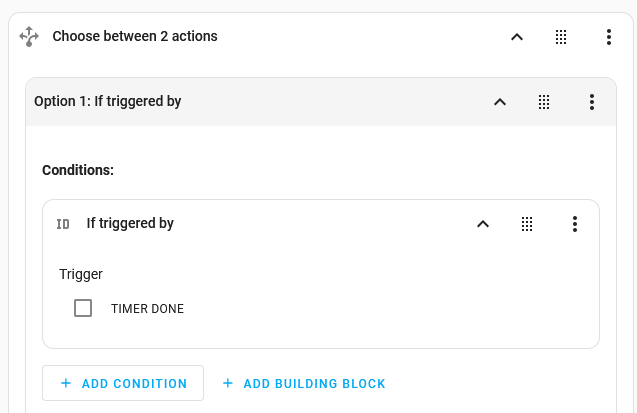
There is nothing in the And if section. For the Then do section choose add building block and use Choose.
- You will have as many options as you have times in your dropdown box plus one to reset the dropdown box.
- First, we make the option to reset the dropdown box. This needs to be the first option.
- Under Option 1, select + Add Condition > Other conditions > Triggered by.
- Now check the box in front of “TIMER DONE”.
-
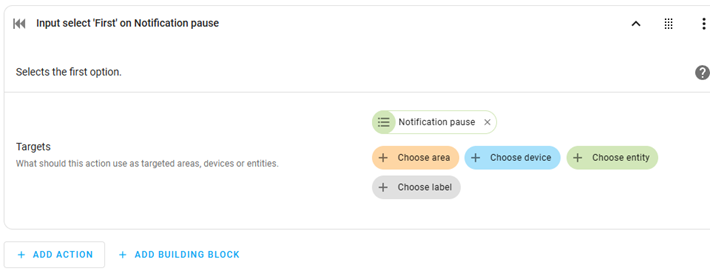
Add an action under this Option 1, choose Select as your action and then choose First.
- Then enter your dropdown box as the entity.
- This will change your dropdown box back to the first item when the timer is done.
- This will allow your notification automation to run again.
-
Let’s code the first option to pause the notifications now.
- Under Option 2, select + Add Condition > Entity > State.
- Your dropdown box goes in the Entity and for State choose your first time delay.
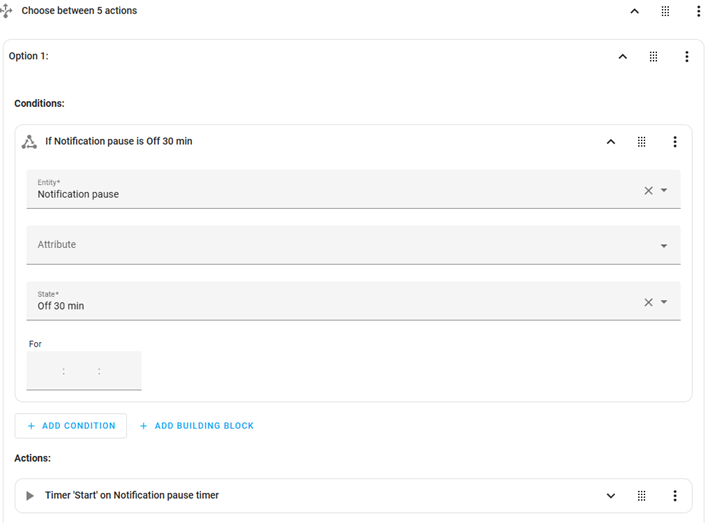
-
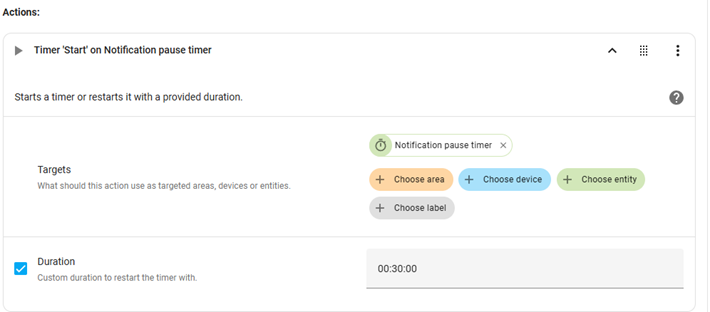
For + Add Action, choose Helpers > Timer > Start and enter your timer entity.
- Check the duration box and enter the time delay you used for your first time delay. Format is HH:MM:SS
-
The only thing left here is to duplicate Option 2 as many items as you have in your dropdown box.
- The only changes you will need to make for each new option is to choose the correct state (time amount) for the dropdown box and then change the amount of time in the timer.
- You can easliy duplicate by clicking the three dots
menu at the far right of the option.
-
Lastly, you need to apply this new feature.
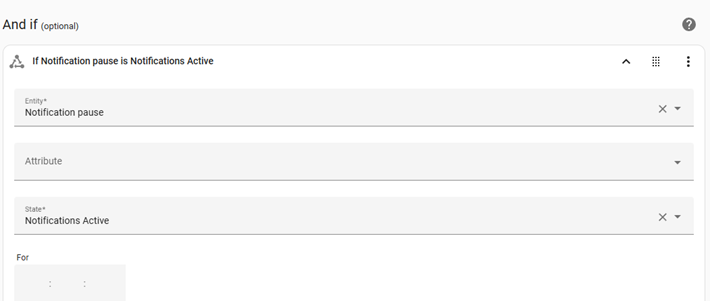
- Go into your rich notifications automation, or for that matter any automation that you would like to have pause control over, and add a condition.
- Below is an example. In the And if press + Add condition > Entity > State add select the dropdown box as the entity and “Notifications Active”, the first item, as the state.
-
Add the dropdown box and the timer onto your dashboard and you are all set.
- Here is what it looks like when it is running (holding notifications).
- You can end it early by just selecting the timer, then selecting finish. That ends the timer, it goes to idle, and the automation resets the dropdown box to active.
- When someone presses the doorbell, play ringtones on speakers (Echo Dot/Google Home/smart hubs) throughout the house.
- Pause a TV and show a notification badge on the TV when the doorbell is pressed (only when the TV is already on).
- Play the quick replay messages of a Reolink doorbell only when not home (geofencing)
- Wake up and start recording on other battery cameras nearby if one camera/motion sensor detects an event.
- Turn on the spotlights or sirens of other cameras nearby when one camera detects a person, vehicle, or animal.
- If a camera detects a person/vehicle/animal, then point other PTZ cameras in that direction using PTZ presets.
- Make a timelapse in different directions using PTZ presets and the snapshot service.
- Switch day night mode (Color/IR Black&White) based on sunset/sunrise times or the status of (outdoor) lights instead of relying on the internal light sensor.
- Change the camera volume based on the time and/or when you are home or not (geofencing)
- Increase the framerate and maximum bitrate of a camera when a person/vehicle/animal is detected and lower them again after 1 minute of no detection. This saves storage space, so you can record longer when recording 24/7 without compromising image clarity during events.
- Turn on indoor lights close to windows in a sequence with some time delays if a camera detects a person to make it look like someone is home.
- Show a camera stream on a full screen on a wall panel, tablet, or Google Home display when someone rings the doorbell.
- Switch HDR mode of the camera based on sunset/sunrise
- Make an input boolean helper to easily disable notifications on all cameras and automatically enable notifications again after 1 hour.
Known limitations
- 2-way audio or Text-to-speech is not available in the Reolink Home Assistant integration.
- The 4K camera streams are H265 encoded, support for playing H265 encoding in browsers (such as Chrome, Firefox, Edge, or Safari) is still very limited, therefore the 4K clear stream may not play in all browsers or on all phones in the Home Assistant Companion app. By default only the lower resolution Fluent camera entity is enabled in Home Assistant. This Fluent stream is H264 encoded and will play on any browser or phone.
Troubleshooting
Can’t set up the integration
- Older firmware versions do not expose the necessary information the integration needs to function. Ensure the camera is updated to the latest firmware before setting up the integration. Note that Reolink auto update and check for update functions in the app/windows/web client often do not show the latest available firmware version. Therefore check the version in the Reolink download center online.
- Test if you can access the camera by its IP address in your browser
https://<your-camera-ip>. If you cannot, in the Reolink mobile app, Windows, or Mac client ensure at least one of the HTTP/HTTPS ports are enabled under Settings > top camera model box > Network Information > Advanced (mobile) or Settings > Network > Advanced > Port Settings (PC). See additional instructions on the Reolink site. - On some camera models, the RTMP port needs to be enabled in order for the HTTP(S) port to function properly. Make sure this port is also enabled if you get a
Cannot connect to hosterror while one of the HTTP/HTTPS ports is already enabled. - If the integration and the browser can’t connect to the camera even after you enable the HTTP/HTTPS ports, try to create a new user on the camera; that fixes the problem in some cases.
- Using a VLAN or other network restrictions between the Home Assistant device and the Reolink device is possible, but is also known to cause issues when not properly configured. Ensure HTTP (port 80), HTTPS (port 443), RTMP (port 1935), RTSP (port 554), ONVIF (port 8000) and TCP (port 9000) communication is not being blocked. When experiencing issues, please first test if moving the Reolink device to the same VLAN as the Home Assistant device and lifting all restrictions between them solves the issue.
Entities intermittently become unavailable
- Note that almost all entities, including motion/ai detection and the camera streams, will be unavailable when privacy mode is turned ON. Check the history of the Privacy mode entity to see if this is causing the issues.
- Setting a static IP address for Reolink cameras/NVRs in your router is advisable to prevent (temporal) connectivity issues when the IP address changes.
- Do not set a static IP in the Reolink device itself, but leave the Connection Type on DHCP under Settings > Network > Network Information > Set Up. If you set it to static on the Reolink device itself, this is known to cause incorrect DHCP requests on the network. The incorrect DHCP request causes Home Assistant to use the wrong IP address for the camera, resulting in connection issues. The issue originates from the Reolink firmware, which keeps sending DHCP requests even when you set a static IP address in the Reolink device.
- Reolink cameras can support a limited amount of simultaneous connections. Therefore using third-party software like Frigate, Blue Iris, or Scrypted, or using the ONVIF integration at the same time can cause the camera to drop connections. This results in short unavailabilities of the Reolink entities in Home Assistant. Especially when the connections are coming from the same device (IP) where Home Assistant is running, the Reolink cameras can get confused, dropping one connection in favor of the other originating from the same host IP. If you experience disconnections/unavailabilities of the entities, please first temporarily shut down the other connections (like Frigate) to diagnose if that is the problem. If that is indeed the problem, you could try moving the third-party software to a different host (IP address) since that is known to solve the problem most of the time. You could also try switching the protocol to FLV on Home Assistant and/or the third-party software, as that is known to be less resource-intensive on the camera.
- If the Reolink entities go to unavailable for short periods, the camera may be overloaded with requests resulting in short connection drops. To resolve this, first, check if the integration is using
ONVIF pushinstead ofONVIF long polling(resource intensive) orFast polling(very resource intensive), see the Reducing latency of motion events section. Moreover, try switching to the FLV streaming protocol which is the least resource-intensive for the camera, see the options section.
Battery drains fast
The Reolink Home Assistant integration is supposed to wake battery cameras only once every 6 hours for a few seconds, or to perform a data update when the battery camera wakes up on its own (at most once per hour). This should not have a significant impact on battery life. You can check the correct operation using the Sleep status entity. However, several factors can have a significant impact on battery life:
- Make sure the Preload camera stream option is turned off for all battery camera entities under Settings > Devices & services > Reolink integration card > x devices > select the battery camera > select the camera stream (do this for all enabled streams) > Gear icon
. The Preload camera stream will keep a active stream open, keeping the camera awake. This will drain the battery. - Make sure the Manual Record switch is turned off. While this switch is on, the camera will be awake and recording. Excessive use of this entity will drain the battery.
- Automations which use entities from a Reolink battery camera can wake up the camera. Changing settings or requesting a snapshot will wake the battery camera for 10-30 seconds. When automations trigger very often, this can cause excessive battery use.
- Some Custom cards that can be used to view the camera in a dashboard are known to keep a battery camera constantly awake, draining its battery.
- Viewing a dashboard with a picture-entity card of a Reolink battery camera, will wake that camera to show the latest snapshot and/or stream. Therefore, it is recommended to place the picture-entity cards in a separate dashboard/tab, which is only accessed when actually wanting to view the battery camera streams.
Slow startup
- If you are using an NVR or Home Hub, check whether a camera is currently offline or unreachable. For example, this can happen with a battery camera whose battery is completely drained, a PoE camera with an unplugged or damaged network cable, a Wi-Fi camera with outdated network credentials or power which is unplugged, or a camera whose IP address has changed. To speed up startup, bring the camera back online or remove it from the NVR or Home Hub in the Reolink app (or using a mouse and screen for a NVR).
- If your Home Assistant device and Reolink device are separated by a VLAN or other network restrictions, follow the guidance in the earlier Can’t set up the integration section. The same network restrictions can also cause slow startup issues.
Streams or recordings not playing
- Most Reolink cameras use h265 encoding for the high resolution recording and clear stream to save storage space and bandwidth. Playback of this h265 encoding is not supported by all browsers or apps. Therefore, the high-resolution recording and/or clear stream may not function on all your devices from which you acces Home Assistant. To see if a Reolink camera is using h264 or h265 encoding, download the diagnostics text file and find the
"encoding main": "h265"\"h264"in the txt file. The low-resolution recording and fluent stream always use h264 encoding and, therefore, do not suffer from this issue.
Reducing latency of motion events
TCP push and ONVIF push will result in slightly faster state changes of the binary motion/AI event sensors than ONVIF long polling. Moreover, TCP push and ONVIF push are less demanding for the camera than ONVIF long polling or fast polling, resulting in potentially less connection issues. TCP push does not have any particular requirements. However, ONVIF push has some additional network configuration requirements:
-
Reolink products cannot push ONVIF motion events to an HTTPS address (SSL). Therefore, make sure a (local) HTTP address at which HA is reachable is configured under Home Assistant URL in the network settings. A valid address could, for example, be
http://192.168.1.10:8123where192.168.1.10is the IP of the Home Assistant device. -
Since an HTTP address is needed, Reolink push is incompatible with a global SSL certificate. Therefore, ensure no Global SSL certificate is configured in the
configuration.yamlunder HTTP. An SSL certificate can still be enforced for external connections, by, for instance, using the NGINX add-on or NGINX Proxy Manager add-on instead of a globally enforced SSL certificate.
To see if a Reolink integration is currently using TCP push, ONVIF push, ONVIF long polling or Fast polling, download the diagnostics text file and find the "event connection": "TCP push"\"ONVIF push"\"ONVIF long polling"\"Fast polling" in the txt file.