Rabbit Air
The Rabbit Air integration lets you control your air purifier over the local network. The following device models are currently supported:
- MinusA2 (2-nd generation)
- A3
The fan platform of this integration allows you to turn the unit on/off, select the preset mode, or set the speed manually.
Prerequisites
To set up the integration, you will need to know a device address and an access token.
- Open the Rabbit Air mobile app. You will see a list of devices connected to your account.
- Tap the list item, and the device control page will open.
- On the device page, select the Edit button. You will see a page with the device location and name settings.
- On this page, quickly tap Serial Number several times until you see two more previously hidden lines. The first is the device ID, and the second is the access token.
Note that the device ID is used as an mDNS name of the device. So you can specify it as the “Host” value by adding the suffix “.local” at the end.
For example, you got:
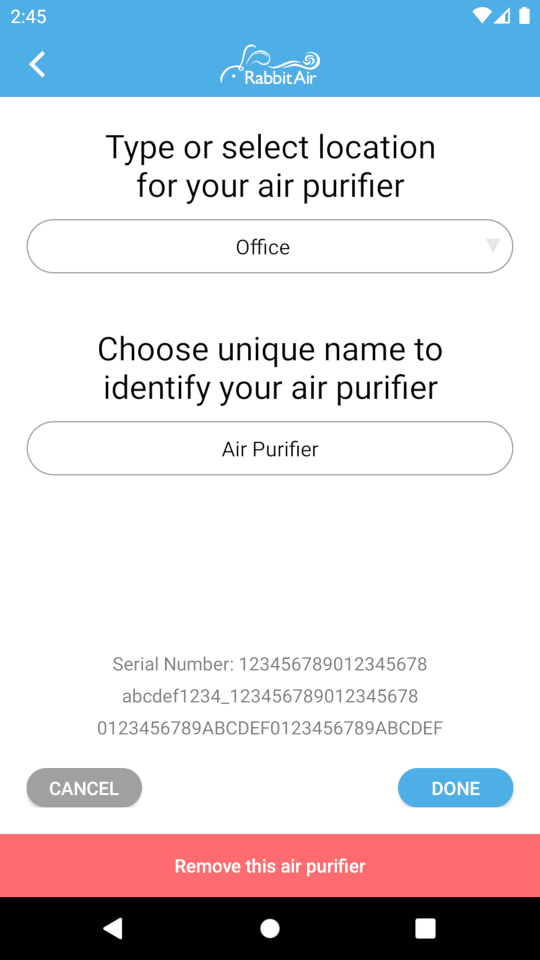
Then you can use abcdef1234_123456789012345678.local as the Host and 0123456789ABCDEF0123456789ABCDEF as the Access Token.
In some cases the access token may not be available right away, then you will see a “Tap for setup user key” message instead. To generate the access token, tap on this message and follow the instructions. If the app says “your device is not supported”, it probably means that you are trying to connect to a first-generation MinusA2 model (an older hardware revision). It is not yet supported by this integration.
Configuration
To add the Rabbit Air integration to your Home Assistant instance, use this My button:

Rabbit Air can be auto-discovered by Home Assistant. If an instance was found, it will be shown as Discovered. You can then set it up right away.
If it wasn’t discovered automatically, don’t worry! You can set up a manual integration entry:
-
Browse to your Home Assistant instance.
-
In the bottom right corner, select the
Add Integration button. -
From the list, select Rabbit Air.
-
Follow the instructions on screen to complete the setup.