OpenAI Conversation
The OpenAI integration adds a conversation agent powered by OpenAI
Controlling Home Assistant is done by providing the AI access to the Assist API of Home Assistant. You can control what devices and entities it can access from the exposed entities page. The AI is able to provide you information about your devices and control them.
This integration does not integrate with sentence triggers.
This integration requires an API key to use, which you can generate here.
Configuration
To add the OpenAI Conversation service to your Home Assistant instance, use this My button:

If the above My button doesn’t work, you can also perform the following steps manually:
-
Browse to your Home Assistant instance.
-
In the bottom right corner, select the
Add Integration button. -
From the list, select OpenAI Conversation.
-
Follow the instructions on screen to complete the setup.
Generate an API Key
The OpenAI key is used to authenticate requests to the OpenAI API. To generate an API key take the following steps:
- Log in to the OpenAI portal
or sign up for an account. - Enable billing with a valid credit card
- Configure usage limits
. - Visit the API Keys page
to retrieve the API key you’ll use to configure the integration.
Options
Options for OpenAI Conversation can be set via the user interface, by taking the following steps:
- Browse to your Home Assistant instance.
- Go to Settings > Devices & Services.
- If multiple instances of OpenAI Conversation are configured, choose the instance you want to configure.
- Select the integration, then select Configure.
Instructions for the AI on how it should respond to your requests. It is written using Home Assistant Templating.
If the model is allowed to interact with Home Assistant. It can only control or provide information about entities that are exposed to it.
If you choose to not use the recommended settings, you can configure the following options:
The GPT language model is used for text generation. You can find more details on the available models in the GPT-4o Documentation
The maximum number of words or “tokens” that the AI model should generate in its completion of the prompt. For more information, see the OpenAI Completion Documentation
A value that determines the level of creativity and risk-taking the model should use when generating text. A higher temperature means the model is more likely to generate unexpected results, while a lower temperature results in more deterministic results. See the OpenAI Completion Documentation
An alternative to temperature, top_p determines the proportion of the most likely word choices the model should consider when generating text. A higher top_p means the model will only consider the most likely words, while a lower top_p means a wider range of words, including less likely ones, will be considered. For more information, see the OpenAI Completion API Reference
Enable OpenAI-provided Web search tool
The search is performed with a separate fine-tuned “gpt-4o-search-preview” or “gpt-4o-mini-search-preview” model with its own context and its own pricing
Talking to Super Mario over the phone
You can use an OpenAI Conversation integration to talk to Super Mario and, if desired, have it control devices in your home.
Actions
Action openai_conversation.generate_image
Allows you to ask OpenAI to generate an image based on a prompt. This action populates Response Data with the requested image.
| Data attribute | Optional | Description | Example |
|---|---|---|---|
config_entry |
no | Integration entry ID to use. | |
prompt |
no | The text to turn into an image. | Picture of a dog |
size |
yes | Size of the returned image in pixels. Must be one of 1024x1024, 1792x1024, or 1024x1792, defaults to 1024x1024. |
1024x1024 |
quality |
yes | The quality of the image that will be generated. hd creates images with finer details and greater consistency across the image. |
standard |
style |
yes | The style of the generated images. Must be one of vivid or natural. Vivid causes the model to lean towards generating hyper-real and dramatic images. Natural causes the model to produce more natural, less hyper-real looking images. |
vivid |
The response data field url will contain a URL to the generated image and revised_prompt will contain the updated prompt used.
Example using a generated image entity
The following example shows an automation that generates an image and displays it in a image template entity. The prompt uses the state of the weather entity to generate a new image of New York in the current weather state.
The resulting image entity can be used in, for example, a card on your dashboard.
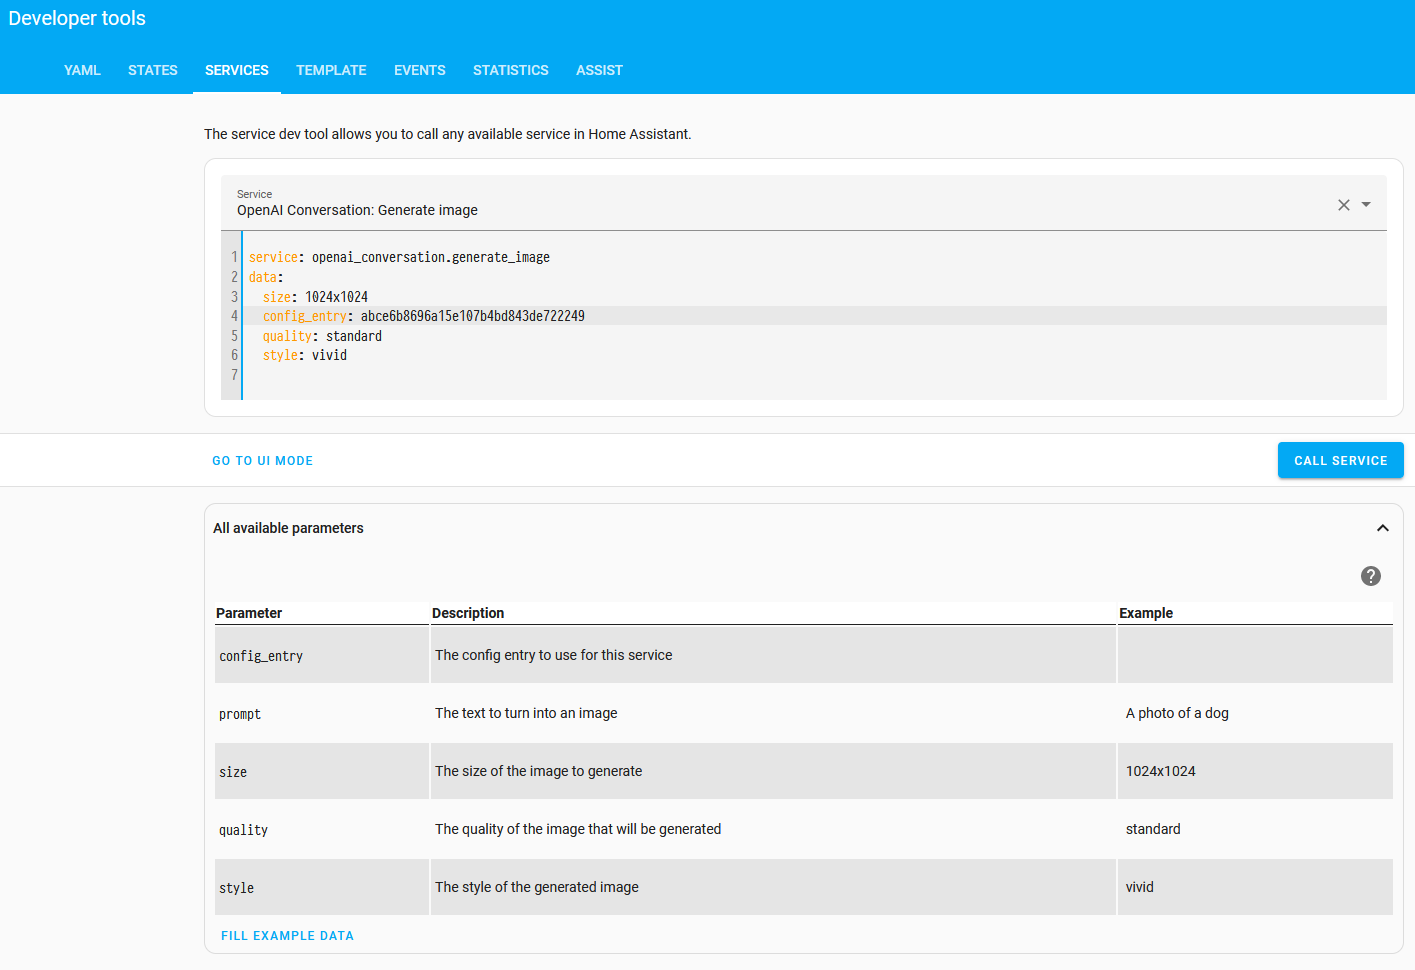
The config_entry is installation specific. To get the value, make sure the integration has been installed. Then, go to Developer Tools > Actions. Ensure you are in UI mode and enter the following below:
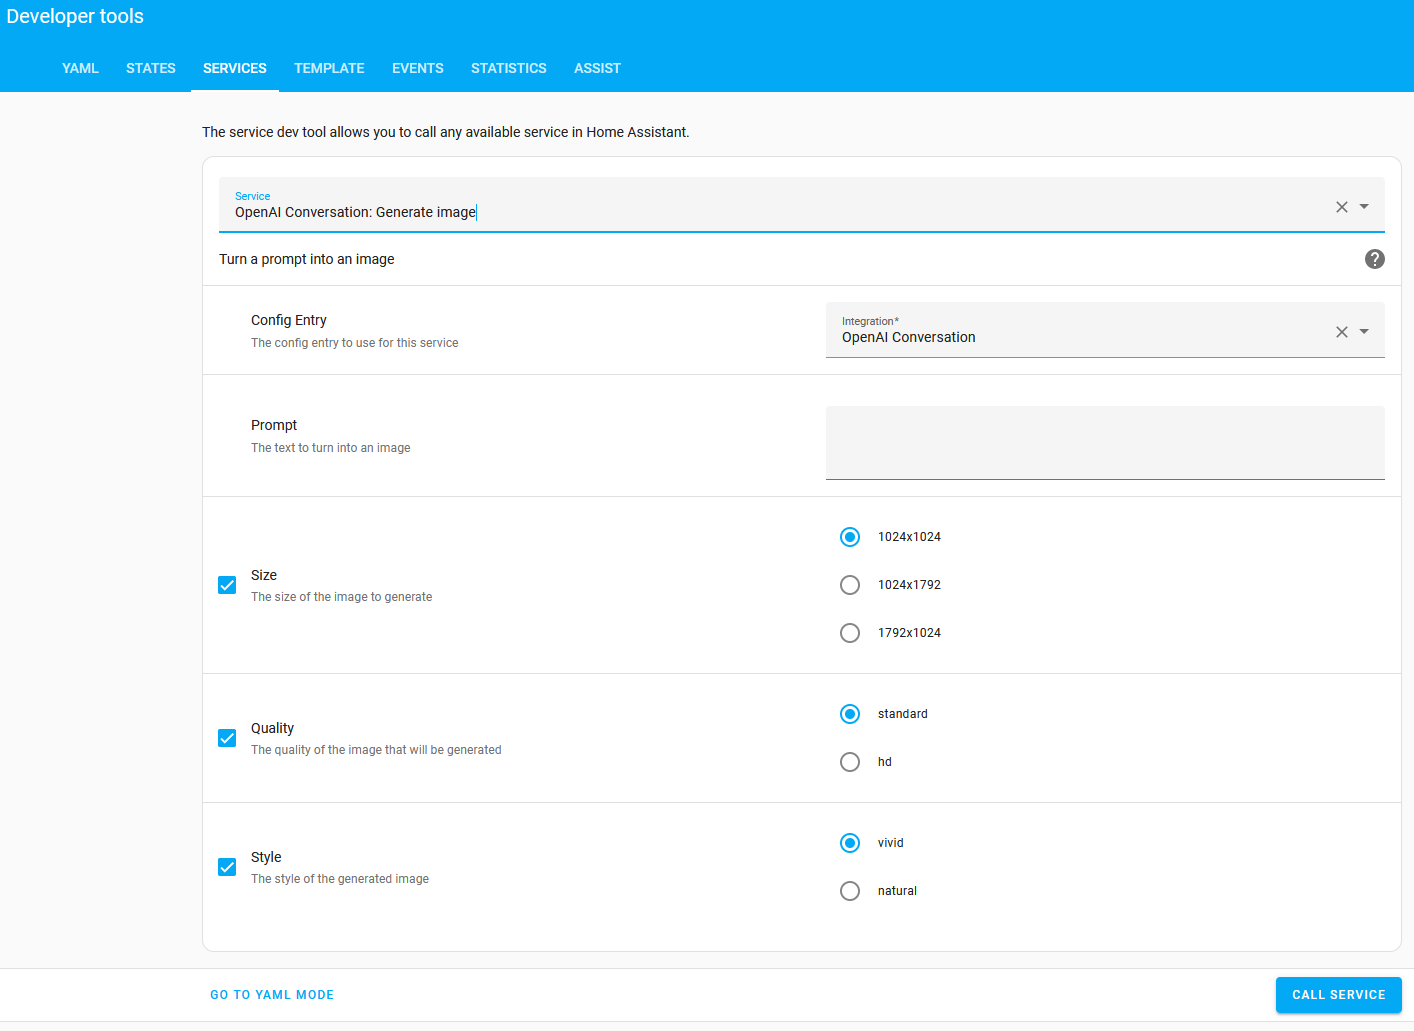
Select YAML Mode to reveal the config_entry value to be used in the below example automation.
Service openai_conversation.generate_content
Allows you to ask OpenAI to generate a content based on a prompt. This service populates Response Data with the response from OpenAI.
-
Service data attribute:
config_entry- Description: Integration entry ID to use.
- Example:
- Optional: no
-
Service data attribute:
prompt- Description: The text to generate content from.
- Example: Describe the weather
- Optional: no
-
Service data attribute:
image_filename- Description: List of file names for images to include in the prompt.
- Example: /tmp/image.jpg
- Optional: yes
The response data field text will contain the generated content.
Another example with multiple images: