Blog
Energy Management in Home Assistant
TL; DR: We’re adding energy management and it’s awesome. Created two products to read out electricity meters: SlimmeLezer

The world is in a climate crisis. Global warming is a reality and the weather is getting unpredictable. Our way of living needs to change, at all levels. I am worried that the climate crisis is something that the world is going to try to solve too late and after irreversible damages have already been done.
So with Home Assistant we want to do our part to help take on the climate crisis, and help you do the same. One part of fighting the climate crisis is making sure our homes are energy efficient and use low-carbon energy sources.
Starting today, Home Assistant is adding official support for home energy management. Our energy management will help users monitor the energy usage, transition to sustainable energy and save money.
 Home automation and energy management are built on top of knowing what devices are doing
Energy management and Home Assistant in context
Bill Gates was recently interviewed by Marques Brownlee (MKBHD) and talked about how intelligent homes are needed to make smart cities. And how all of this starts with energy management in the home. The interview is 3 minutes and worth watching:
Home Assistant won’t have all the answers when it comes to energy management, at least not right away. But we have two key things going for us that makes us the perfect platform to choose for your energy management:
The first is that we’re completely open. This means that with Home Assistant, anyone can use the source
The second thing is that we have a passionate and global community that wants to make their homes the best it can be. A community that revolves around building and sharing their own hardware and software to be able to achieve their goals. Through experimentation and iteration we will be able to improve energy management over time to fit our needs – there are no investors to satisfy.
When it comes to your home, Home Assistant is the best platform to manage it and figure out what works and what doesn’t.
Read on →2021.8.0: Feel the energy ⚡️
Happy August! ☀️
Home Assistant Core 2021.8 is here, and this is the release I have been looking forward to for months! There is so much exciting new stuff in here: I don’t know where to start.
The most exciting part is the new main focus that is added to Home Assistant:
Home Energy management.
A massive deal for a lot of people, no matter if you are doing it for environmental reasons or simply to save a buck or two (or both 😬). Knowing that moving forward, it will be an additional focus, I think, is amazing.
But besides the Energy management stuff, I’m also excited about the side effects of it. A lot of things created for Energy, are also re-usable for other things! That is how we roll, right?
We get long-term statistics, new super nice and fast graphs, and a new layout option for Lovelace. All the building blocks are available for customization and re-use. I am looking forward to seeing how they are going to be put to use.
Anyways, enjoy the release! And don’t forget the drop by
the release party on YouTube
../Frenck
- Matthias de Baat joins Nabu Casa
- Home Energy Management!
- Long term statistics
- Sidebar view
- Gauge card now has needle mode
- Currency core setting
- Siren
- Locking, Unlocking and Jammed
- Scripts/Automations/Templates
- Other noteworthy changes
- New Integrations
- New Platforms
- Integrations now available to set up from the UI
- Release 2021.8.1 - August 4
- Release 2021.8.2 - August 5
- Release 2021.8.3 - August 6
- Release 2021.8.4 - August 8
- Release 2021.8.5 - August 9
- Release 2021.8.6 - August 10
- Release 2021.8.7 - August 15
- Release 2021.8.8 - August 18
- If you need help…
- Backward-incompatible changes
- Farewell to the following
- All changes
Matthias de Baat joins Nabu Casa
Let start by announcing that Matthias de Baat
UX stands for “User Experience”, which is Matthias’ area of expertise and what he will be working on improving. His goal is to make Home Assistant easier to use and accessible for everyone. He will be setting up design processes and tooling, doing user research and making designs.
If you are interested in joining the Home Assistant user research group, you
can show your interest by filling in this Google Form
Welcome Matthias! Excited to have you on board!
But wait! There is more!
[Otto Winter][@ottowinter], the founder of ESPHome
Home Energy Management!
This feature is a big thing; A start of something new. Home Assistant is going to provide you insight into your energy usage.
But this needs more than just a paragraph in the release notes, this needs its own blog! So, at this point, stop reading the release notes (momentarily) and read the blog Paulus has written about this:
Read the blog about the new Home Energy Management features of Home Assistant
Long term statistics
Storing sensor data for a more extended period using the recorder, can make your database grow pretty fast (especially if you have sensors that update a lot!).
In the previous releases, we’ve worked towards improving this situation and laid down the groundwork for tracking statistics in the database; We are making it widely available this release!
Integrations can now hint Home Assistant about the type of value the sensor represents, allowing us to process and store that data in a more efficient way. Every hour, we calculate things like mean, min/max values, or the difference created that hour and store just that result in our long-term statistics.
These statistics is what partly powers the new Energy dashboard, however, they can be used for anything else: Introducing the Lovelace statistics graph card.
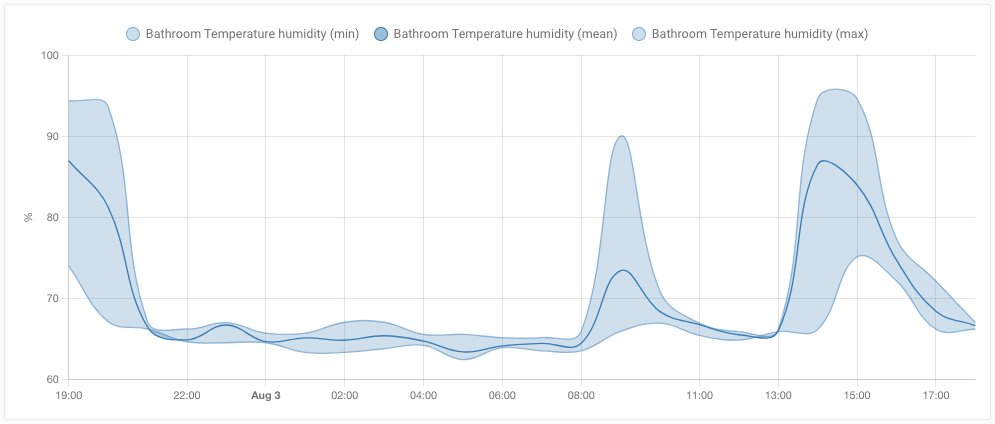 Screenshot of the new Lovelace statistics graph card.
This card can make beautiful graphs, allowing you to make graphs for any of
your stored long-term statistical data. It can render as a line or bar chart.
Bars are suited for metered entities that have a summed value. Lines are
perfect to display the mean, min and max of the entity.
The support for long-term statistics is limited at this moment. We are expecting to open it up for more measurements in the upcoming releases while more integrations are adding support for these new measurement types.
Sidebar view
The default layout you see in Lovelace (which we generally all use), is called the “masonry” layout. We also have a panel view/layout that stretches a single card to the whole view. This release brings in a brand new view layout: Sidebar.
This new sidebar view has two columns, a wide one and a small one on the right. It is perfect for displaying larger cards like graphs (like that nice new statistics graph card), or maps. While having some additional smaller cards with information on the side.
The new Energy dashboard uses this new view layout, but of course, made available for use in other Lovelace dashboards as well.
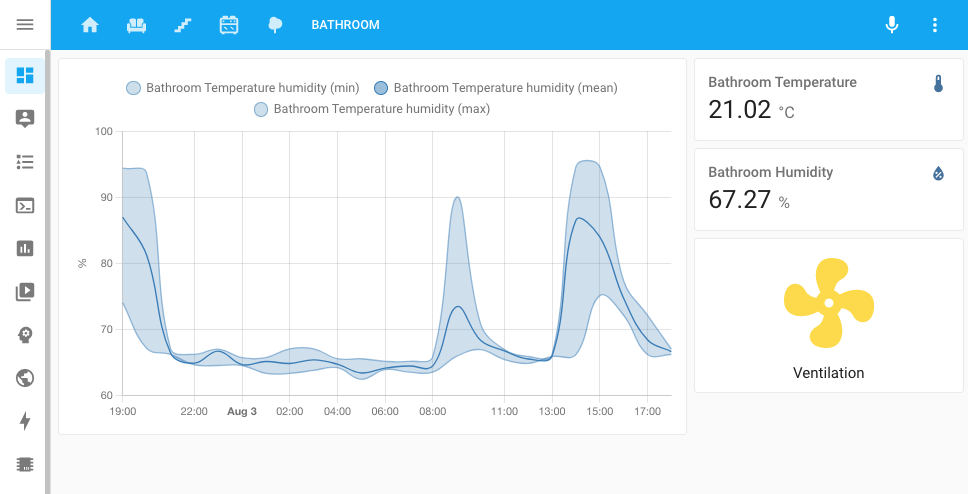 Screenshot of new Lovelace sidebar view layout.
Gauge card now has needle mode
A nice little addition to the Lovelace gauge card: Needle mode!
Instead of showing a value and filling it partially, in needle mode, it will show the full gauge but point out the value with a needle. And, if you add severity to your gauge card configuration, it will always be shown.
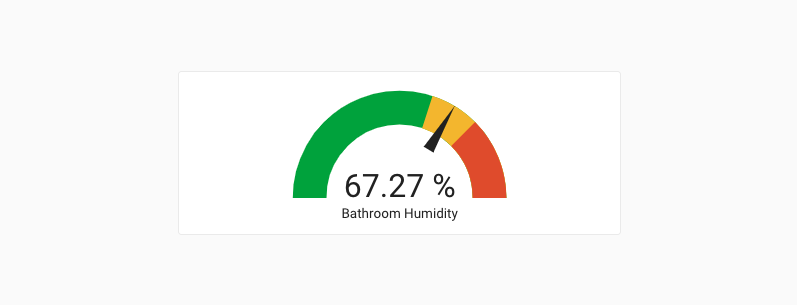 Screenshot of the Gauge card in needle mode with severity configured.
These settings are available straight from the Lovelace UI editor; More information and examples can be found in the Gauge card documentation.
Currency core setting
To support the display of financial values, we’ve added a new setting to Home Assistant that allows you to define the currency Home Assistant should use in cases it relies on your input.
You can find this new currency setting in the general settings of Home Assistant.
This setting is used for the cost calculation of the new energy features.
Siren
The last release, we introduced the select entity,
this release, we introduce the siren entity! 🚨
Thanks to @raman325
Locking, Unlocking and Jammed
Locks in Home Assistant can be a little bit smarter as of today, thanks
to @bdraco
Support for these new states has been added to the August, HomeKit Controller and template integrations. Additionally, HomeKit, Alexa and Google Assistant have been made compatible and aware for these states as well.
Scripts/Automations/Templates
Some new features landed for script, automations and templates this release.
This
When an automation or script is triggered to run, a new variable is available:
this. This variable contains the state object
of the automation or script running and allows you to access information about
the automation directly. Thanks, @r-t-s
Device template functions
If you like to write YAML automations manually, are using templates, and require device IDs or device information, than you know those IDs are hard to find and the device information is not available at all.
@raman325
-
device_entities(device_id)returns a list of entities associated with a given device ID (can also be used as a filter). -
device_attr(device_or_entity_id, attr_name)returns the value ofattr_namefor the given device ID or entity ID. -
is_device_attr(device_or_entity_id, attr_name, attr_value)returns whether the value ofattr_namefor the given device ID or entity ID matchesattr_value. -
device_id(entity_id)returns the device ID for a given entity ID (can also be used as a filter).
Thanks for these powerful new features!
Other noteworthy changes
There is much more juice in this release; here are some of the other noteworthy changes this release:
- Thanks to @firstof9
, Z-Wave JS now has support for transitions with lights! - More Z-Wave JS improvements by @raman325
. He added support for device triggers and conditions. Thanks! - You can now assign a unique ID to light, cover and media player groups, allowing you to manage them from the Home Assistant frontend and assign them to an area!
- The motionEye integration now has support for motion detection, thanks @dermotduffy
- ZHA can now work with Formaldehyde and VOC level sensors, thanks @Adminiuga
-
@posixx
added a new feature for integration that provide alarm panels; those integrations can now update to support Vacation mode! - Rainbird now has a service to change the rain delay, thanks @Kr0llx
! - If you are using BMW Connected Drive, @EddyK69
added a lot of trip sensors. - Sonos snapshots now behave, are more robust and work as expected. Additionally,
support for controlling crossfade has been added, thanks @jjlawren
! - WLED now supports controlling the new playlists features introduced in WLED 0.13.
-
@farmio
added support for KNX lights that use HS-colors, thanks! - And @joncar
added support for transitions to LiteJet lights, awesome! - If you have MFA on your Tesla account, thanks to @BreakingBread0
, the integration now supports that. - When using the Netatmo integration, you can now control the schedule it
should be using with a select entity. Thanks, @cgtobi
! -
@janiversen
added more data types to modus and added array write to the turn on/off capabilities of Modbus switches, fans and lights. - Advantage Air now has temperature sensors for each zone, thanks @Bre77
! - Gree Climate now has switches to support more modes, thanks to @cmroche
! - You can now remove holidays from the workday sensor by name instead of
date. This is useful for holidays they don’t have a fixed date each year.
Thanks @matthewgottlieb
! - HomeKit will not auto-recreated TVs when sources are out of sync. One thinsg
less to worry about, thanks @bdraco
-
@jbouwh
has drastically reworked and extended the Humidifier support for the Xiaomi Miio integration. Amazing job!
New Integrations
We welcome the following new integrations this release:
-
Adax, added by @Danielhiversen
- Energy, added by the Home Assistant Core team
-
Flipr, added by @cnico
-
Generic Hygrostat, added by @Shulyaka
-
Prosegur, added by @dgomes
-
Siren, added by @raman325
-
YouLess, added by @gjong
-
Renault, added by @epenet
New Platforms
The following integration got support for a new platform:
-
Belkin WeMo added sensors for energy usage. Added by @esev
-
Freedompro now supports binary sensors, sensors, switches, locks, covers, climate and fans! Added by @stefano055415
-
GIOŚ now has sensors for replacing the air quality platform, added by @bieniu
-
Goal Zero Yeti, added sensors that provide a lot of information, added by @tkdrob
-
Itho Daalderop Spider, added sensors for energy usages. Added by @peternijssen
-
Mill, added support for sensors for its energy consumption, added by @Danielhiversen
-
motionEye now exposes switches, added by @dermotduffy
-
TP-Link Kasa Smart added sensors for energy usage. Added by @mib1185
-
Velux now supports lights, added by @bramstroker
-
Z-Wave JS now supports sirens, added by @raman325
Integrations now available to set up from the UI
The following integrations are now available via the Home Assistant UI:
-
CO2 Signal, done by @Danielhiversen
-
Honeywell Total Connect Comfort (US), done by @rdfurman
-
Notifications for Android TV / Fire TV, done by @tkdrob
-
Switcher, done by @thecode
-
Yale Smart Living, done by @gjohansson-ST
Release 2021.8.1 - August 4
- Fix Panasonic Viera TV going unavailable when turned off (@Hyralex
- #53788 ) (panasonic_viera docs) - Add temporary fix to modbus to solve upstream problem (@janiversen
- #53857 ) (modbus docs) - Fix attr_unit_of_measurement in update of apcupsd entity (@mib1185
- #53947 ) (apcupsd docs) - Fix coordinator not defined in yale_smart_alarm (@gjohansson-ST
- #53973 ) (yale_smart_alarm docs) - Fix divider for Fritz sensors (@chemelli74
- #53980 ) (fritz docs) - Fix empty sonos_group entity attribute on startup (@jjlawren
- #53985 ) (sonos docs) - Update frontend to 20210804.0 (@bramkragten
- #53997 ) (frontend docs)
Release 2021.8.2 - August 5
- Bump pylitterbot to 2021.8.0 (@natekspencer
- #54000 ) (litterrobot docs) - Add missing device class to SAJ energy sensors (@frenck
- #54048 ) (saj docs) - Handle empty software version when setting up HomeKit (@bdraco
- #54068 ) (homekit docs) - Bump up ZHA dependencies (@puddly
- #54079 ) (zha docs) - Packages to support config platforms (@balloob
- #54085 ) (automation docs) (script docs) (template docs) - Fix Shelly last_reset (@thecode
- #54101 ) (shelly docs) - Two fixes (@chemelli74
- #54102 ) (fritz docs) - Increase time before scene and script HomeKit entities are reset (@bdraco
- #54105 ) (homekit docs) - Bump zeroconf to 0.33.3 (@bdraco
- #54108 ) (zeroconf docs)
Release 2021.8.3 - August 6
- Gracefully handle additional GSM errors (@ocalvo
- #54114 ) (sms docs) - Handle software version being None when setting up HomeKit accessories (@nzapponi
- #54130 ) (homekit docs) - Fix sensor PLATFORM_SCHEMA for ebox and enphase_envoy (@mib1185
- #54142 ) (enphase_envoy docs) - Fetch interface index from network integration instead of socket.if_nametoindex in zeroconf (@bdraco
- #54152 ) (zeroconf docs) (network docs) - Bump zeroconf to 0.33.4 to ensure zeroconf can startup when ipv6 is disabled (@bdraco
- #54165 ) (zeroconf docs)
Release 2021.8.4 - August 8
- Add missing
motor_speedsensor for Xiaomi Miio humidifier CA1 and CB1 (@bieniu- #54202 ) - Fix update entity prior to adding (@Trinnik
- #54015 ) (aladdin_connect docs) - Fix androidtv media_image_hash (@tkdrob
- #54188 ) (androidtv docs) - Solve missing automatic update of struct configuration in modbus (@janiversen
- #54193 ) (modbus docs) - Update const.py (@Mk4242
- #54195 ) (ebusd docs) - Add parameter to delay sending of requests in modbus (@janiversen
- #54203 ) (modbus docs) - Bugfix: Bring back unique IDs for ADS covers after #52488 (@carstenschroeder
- #54212 ) (ads docs) - Don’t block motionEye setup on NoURLAvailableError (@dermotduffy
- #54225 ) (motioneye docs) - Pin google-cloud-pubsub to an older version (@allenporter
- #54239 )
Release 2021.8.5 - August 9
- Fix camera state and attributes for agent_dvr (@tkdrob
- #54049 ) (agent_dvr docs) - Force an attempted subscribe on speaker reboot (@geuben
- #54100 ) (sonos docs) - Fix login to BMW services for rest_of_world and north_america (@rikroe
- #54261 ) (bmw_connected_drive docs) - Always set interfaces explicitly when IPv6 is present (@bdraco
- #54268 ) (zeroconf docs) - Fix atom integration for long term statistics (@ZeGuigui
- #54285 ) (atome docs) - Use correct state attribute for alarmdecoder binary sensor (@tkdrob
- #54286 ) (alarmdecoder docs) - Bump soco to 0.23.3 (@jjlawren
- #54288 ) (sonos docs) - Fix ondilo_ico name attribute (@cdce8p
- #54290 ) (ondilo_ico docs) - Bump zeroconf to 0.34.3 (@bdraco
- #54294 ) (zeroconf docs) - Ensure hunterdouglas_powerview model type is a string (@bdraco
- #54299 ) (hunterdouglas_powerview docs) - Remove zwave_js transition on individual color channels (@firstof9
- #54303 ) (zwave_js docs) - Restores unit_of_measurement (@dgomes
- #54335 ) (integration docs) - Fix xiaomi air fresh fan preset modes (@jbouwh
- #54342 ) (xiaomi_miio docs) - Update frontend to 20210809.0 (@bramkragten
- #54350 ) (frontend docs) - Fix Xiaomi-miio turn fan on with speed, percentage or preset (@jbouwh
- #54353 ) (xiaomi_miio docs) - Fix aqualogic state attribute update (@dailow
- #54354 ) (aqualogic docs) - Cast SimpliSafe version number as a string in device info (@bachya
- #54356 ) (simplisafe docs) - Do not process forwarded for headers for cloud requests (@balloob
- #54364 ) (http docs) (cloud docs) - Revert “Use entity class attributes for Bluesound (#53033)” (@balloob
- #54365 ) (bluesound docs) - Update Climacell rate limit (@raman325
- #54373 ) (climacell docs) - Fix race condition in Advantage Air (@Bre77
- #53439 ) (advantage_air docs)
Release 2021.8.6 - August 10
- Handle CO2Signal response value being None (@balloob
- #54377 ) (co2signal docs) - Fix Canary sensor state (@ludeeus
- #54380 ) (canary docs) - Re-add Tibber notify service name (@Danielhiversen
- #54401 ) (tibber docs) - Bump hass_nabucasa to 0.46.0 (@balloob
- #54421 ) (cloud docs) - Bump pyopenuv to 2.1.0 (@bachya
- #54436 ) (openuv docs)
Release 2021.8.7 - August 15
- Use pycarwings2 2.11 (@filcole
- #54424 ) (nissan_leaf docs) - Fix Huawei LTE entity state updating (@scop
- #54447 ) (huawei_lte docs) - Strip attributes whitespace in universal media_player (@0xFelix
- #54451 ) (universal docs) - Bump notifications-android-tv to 0.1.3 (@tkdrob
- #54462 ) (nfandroidtv docs) - Updates to bump MyQ to 3.1.2 (@ehendrix23
- #54488 ) (myq docs) - Add missing PRESSURE_BAR conversion (@Danielhiversen
- #54497 ) - Treat temporary errors as warnings for Tesla (@alandtse
- #54515 ) (tesla docs) - Fix attributes not showing after using entity class attributes (@gerard33
- #54558 ) (bmw_connected_drive docs) - Upgrade qnapstats library to 0.4.0 (@colinodell
- #54571 ) (qnap docs) - Fix bug in ambiclimate (@Danielhiversen
- #54579 ) (ambiclimate docs) - Fix Tibber last reset (@Danielhiversen
- #54582 ) (tibber docs) - Adax, update requirements (@Danielhiversen
- #54587 ) (adax docs) - Clamp color temperature to supported range in ESPHome light (@oxan
- #54595 ) (esphome docs) - Bump zeroconf to 0.35.0 (@bdraco
- #54604 ) (zeroconf docs) - Bump py-synologydsm-api to 1.0.4 (@mib1185
- #54610 ) (synology_dsm docs) - Guard partial upgrade (@balloob
- #54617 ) (http docs) - Solve switch/verify register type convert problem in modbus (@janiversen
- #54645 ) (modbus docs) - Send color_brightness to ESPHome devices on 1.20 (pre-color_mode) (@jesserockz
- #54670 ) (esphome docs)
Release 2021.8.8 - August 18
- Fix TPLink emeter reset not updating (@TomBrien
- #54848 ) (tplink docs) - Fix tplink doing I/O in event loop and optimize (@rytilahti
- #54570 ) (tplink docs) - Fix ‘in’ comparisons vesync light (@cdce8p
- #54614 ) (vesync docs) - Update PyMetEireann to 2021.8.0 (@DylanGore
- #54693 ) (met_eireann docs) - Fix BMW remote services in rest_of_world & north_america (@rikroe
- #54726 ) (bmw_connected_drive docs) - Fix HomeKit cover creation with tilt position, open/close, no set position (@bdraco
- #54727 ) (homekit docs)
If you need help…
…don’t hesitate to use our very active forums or join us for a little chat
Experiencing issues introduced by this release? Please report them in our issue tracker
2021.7: A new entity, trigger IDs and script debugging
Happy July, which means Home Assistant Core 2021.7!
An interesting release, with a bunch of little goodies to make things easier in creating automations, scripts and doing templating. Those are things that in general, make me very happy. Mainly because, well, I use Home Assistant to automate 😁
Also, we are saying “hi!” 👋 to a new type of entity, which is really exciting and I can’t wait to see how that is being put to use in the future.
Lastly, I want to give a shout-out to @klaasnicolaas
His internship is now over, and he passed with a nice grade. Yet, he could not leave without a little present as it seems. He contributed the Forecast.Solar integration, bringing in energy production forecasting for your solar panels. Really cool!
Alright, that’s it! Enjoy the release!
../Frenck
- New entity: Select
- Trigger conditions and trigger IDs
- Script debugging
- Referencing other entities in triggers and conditions
- Working with dates in templates
- Series version tags for Docker containers
- Other noteworthy changes
- New Integrations
- New Platforms
- Integrations now available to set up from the UI
- Release 2021.7.1 - July 8
- Release 2021.7.2 - July 12
- Release 2021.7.3 - July 16
- Release 2021.7.4 - July 21
- If you need help…
- Backward-incompatible changes
- All changes
New entity: Select
In this release, we welcome the select entity to the Home Assistant family. The
select entity is a close relative of the dropdown helper (also known as
input_select).
The difference is that while the input select is configured and managed by you, the select entities are provided by integrations.
This means integrations can now provide entities that give a choice. Either in the Lovelace UI, but also via automations using services, and via the Google Assistant.
 Screenshot of a select entity, providing a choice from a list of options.
Some integrations started implementing the first select entities as of this release. MQTT & KNX made it available for use, WLED uses it to provide controls on selecting and activating a user preset, and with Rituals Perfume Genie you can now change the room size for your diffuser.
Trigger conditions and trigger IDs
If you are creating some complex automations in YAML, you might be familiar with this. Consider a big automation, with a whole bunch of triggers. But how would you know which of those triggers actually triggered the automation?
You can now assign an id to your triggers that is passed into automation when
triggered, allowing you to make decisions on it.
automation:
  - alias: "Trigger IDs!"
    trigger:
      - platform: state
        id: "normal"
        entity_id: binary_sensor.gate
        state: "on"
      - platform: state
        id: "forgotten"
        entity_id: binary_sensor.gate
        state: "on"
        for:
          minutes: 10
    ...
The above example triggers the same automation twice, when the gate opens and when the gate is left open for 10 minutes (probably forgotten). Each trigger has its own ID.
Now introducing the new trigger condition! So you can add a condition on which trigger fired the automation.
automation:
  - alias: "Trigger IDs!"
    ...
    action:
      ...
      - condition: trigger
        id: "forgotten"
      - service: notify.frenck_iphone
        data:
          message: "Someone left the gate open..."
You can use the trigger condition in all places where all the other conditions work as well, including things like choose from a group of actions.
Rather use the UI to create and manage your automations? No problem! These new features have been added to the automation editor as well!
 Screenshot of using a trigger condition in the automation editor.
Script debugging
In Home Assistant Core 2021.4, we added the ability to debug automations. In this release, we’ve made these same powerful tools available for scripts!
So, this helps for the next time you are wondering: Why didn’t that script work? Or why did it behave as it did? What the script is going on here?
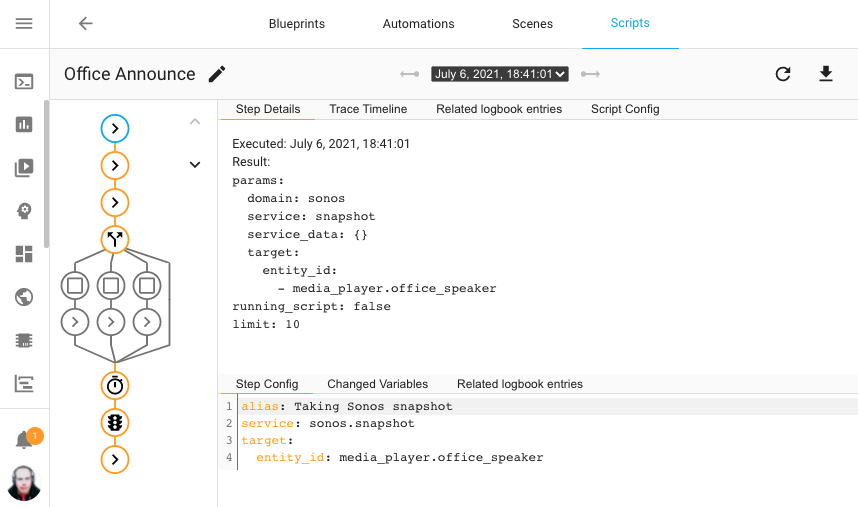 Screenshot of using the new script debugger on my office announce script.
The above screenshot shows a previous run of a script, using an interactive graph for each step in this script; with the path it took highlighted. Each node in the graph can be clicked to view the details of what happened on each step in the script sequence.
Referencing other entities in triggers and conditions
A small, but possibly helpful, change to our script and automations. You can now reference other entities for the above/below values of numeric state triggers and conditions. Both sensors and number entities can be used.
For example, you can now trigger an automation if the outside temperature is higher than the temperature inside.
automation:
  - alias: "Notify to close the window"
    trigger:
      - platform: numeric_state
        entity_id: sensor.outside_temperature
        above: sensor.inside_temperature
    action:
      - service: notify.frenck_iphone
        data:
          message: "Close all windows, it is warm outside!"
The numeric state conditions supports the same.
Additionally, the time conditions now support a similar thing using other sensors that provide a time in the before and after options. Time triggers added support for that already in a previous release.
Working with dates in templates
If you ever tried to work with dates in templates, you probably know that that is hard. And honestly, that will never go away, times, dates and timezones are complex little beasts.
However, we realized that the hardest part of using date & times with templates
is converting the state of a sensor or text to a datetime. This
release adds a small template method to help with that: as_datetime.
It can be used as a filter or as a method. Here is an example of calculating the number of days until my drivers’ license expires:
{{ (states('sensor.drivers_license') | as_datetime - now()).days }} days
Series version tags for Docker containers
If you are using the Home Assistant Container installation method, we recommend using a specific version tag; however, that means you need to update the version tag each time we release a new patch version of Home Assistant.
Thanks to @kmdm
docker pull ghcr.io/home-assistant/home-assistant:2021.7
The 2021.7, will contain the latest July release, even if that is
actually version 2021.7.2.
Other noteworthy changes
There is much more juice in this release; here are some of the other noteworthy changes this release:
- Z-Wave JS got quite a few updates this release:
- A new
zwave_js.multicast_set_valueis available, allowing to issue a set value command via multicast. Thanks, @raman325! - Each node now has a status sensor available and can be pinged using the
new
zwave_js.pingservice. Added by @raman325. - The Z-Wave JS configuration panel now has a “Heal Network” button,
thanks @cgarwood
! - Z-Wave JS Server connection can now be re-configured from the Z-Wave JS
configuration panel, added by @MartinHjelmare
. - Z-Wave JS logs can now be downloaded, thanks @raman325
!
- A new
- The Google Assistant integration now has support for fan speed percentages and
preset modes. Thanks, @jbouwh
! -
@jbouwh
didn’t stop there and added fan preset mode support to Alexa too! - The Philips TV integration now supports Ambilights, added by @elupus
. - Yamaha MusicCast integration now supports grouping services, thanks @micha91
! -
@raman325
added a whole bunch of sensors to the ClimaCell integration! - WLED now supports local push. Updates are now instantly both ways. Also, the master light can be kept and added support for controlling user presets.
- Setting up Xiaomi devices has gotten way easier! There is no need to do
difficult things to get the tokens. Instead, Home Assistant can now extract
the tokens from a Xiaomi Cloud account. Thanks, @starkillerOG
! - More Xiaomi updates, @jbouwh
added support for fan percentage-based speeds and preset modes. -
@RenierM26
added a lot of new services to the Ezviz integration, thanks! - Tibber had quite a few improvements and now provides a power factor sensor,
added by @Danielhiversen
! - Google Translate TTS now supports the Bulgarian language,
thanks @hristo-atanasov
! - If you have a SmartTube, you can now reset your reminders, thanks @mdz
! - KNX had quite a lot of updates and added support for XY-color lights,
thanks @farmio
. -
@OttoWinter
added support for presets, custom presets and custom fan modes for climate controls in ESPHome. Awesome! - Nuki now has a service to enable/disable continuous mode, thanks @anaisbetts
! -
@cgomesu
added quantiles to Statistics integration, thanks! - The Home Assistant login page now better support password manager,
thanks, @rianadon
!
New Integrations
We welcome the following new integrations this release:
-
Ambee, added by @frenck
-
Forecast.Solar, added by @klaasnicolaas
-
Freedompro, added by @stefano055415
-
Modern Forms, added by @wonderslug
-
Select, added by @frenck
New Platforms
The following integration got support for a new platform:
-
AVM FRITZ!Box Tools now has switches available, added by @chemelli74
-
Bosch SHC has now several sensors for their devices, added by @tschamm
-
Groups now support creating Media Player groups, added by @definitio
-
Hyperion can now provide a camera feed with the live image, added by @dermotduffy
-
KNX added support for number and the new select entities, added by @farmio
-
Meteoclimatic now provides sensors with weather information, added by @adrianmo
-
MQTT got support for the new select entities, added by @emontnemery
-
Rituals Perfume Genie added a number and select entity to adjust your diffuser, added by @milanmeu
-
SIA Alarm Systems now provides various binary sensors, added by @eavanvalkenburg
-
Sony Bravia TV now offers a remote entity, added by @Drafteed
-
Switcher now provides sensors, added by @thecode
-
WLED now exposes color palettes and presets using select entities, added by @frenck
Integrations now available to set up from the UI
The following integrations are now available via the Home Assistant UI:
-
Coinbase, done by @TomBrien
-
DSMR Slimme Meter, done by @RobBie1221
-
Yamaha MusicCast, done by @vigonotion
Release 2021.7.1 - July 8
- Fix service registration typo in Nuki integration (@anaisbetts
- #52631 ) (nuki docs) - Fix Fritz default consider home value (@chemelli74
- #52648 ) (fritz docs) - Handle KeyError when accessing device information (@ludeeus
- #52650 ) (ecovacs docs) - Warn if
interface_addrremains in Sonos configuration (@jjlawren- #52652 ) (sonos docs) - Ignore unused keys from Sonos device properties callback (@jjlawren
- #52660 ) (sonos docs) - Ensure Forecast.Solar returns an iso formatted timestamp (@frenck
- #52669 ) (forecast_solar docs) - Use iso-formatted times in MetOffice weather forecast (@avee87
- #52672 ) (metoffice docs) - Fix precipitation calculation for hourly forecast (@agners
- #52676 ) (openweathermap docs) - Move recorder.py import to runtime (@uvjustin
- #52682 ) (stream docs) - Bump simplisafe-python to 11.0.1 (@bachya
- #52684 ) (simplisafe docs) - pyWeMo version bump (0.6.5) (@esev
- #52701 ) (wemo docs) - Bump pylutron to 0.2.8 fixing python 3.9 incompatibility (@JonGilmore
- #52702 ) (lutron docs) - Add check for _client existence in modbus (@janiversen
- #52719 ) (modbus docs) - Fix KNX Fan features (@Tommatheussen
- #52732 ) (fan docs) - Esphome fix camera image (@jesserockz
- #52738 ) (esphome docs)
Release 2021.7.2 - July 12
- Ignore Sonos Boost devices during discovery (@jjlawren
- #52845 ) (sonos docs) - Add zeroconf discovery to Sonos (@bdraco
- #52655 ) (sonos docs) - Remove scale calculation for climacell cloud cover (@apaperclip
- #52752 ) (climacell docs) - Fix homebridge devices becoming unavailable frequently (@Jc2k
- #52753 ) (homekit_controller docs) - Fix nexia thermostats humidify without dehumidify support (@bdraco
- #52758 ) (nexia docs) - Support certain homekit devices that emit invalid JSON (@Jc2k
- #52759 ) (homekit_controller docs) - Send ssdp requests to ipv4 broadcast as well (@bdraco
- #52760 ) (ssdp docs) - Bump dependency to properly handle current and voltage not being reported on some zhapower endpoints (@Kane610
- #52764 ) (deconz docs) - Upgrade pymazda to 0.2.0 (@bdr99
- #52775 ) - Fix ESPHome Camera not merging image packets (@OttoWinter
- #52783 ) (esphome docs) - Fix Neato parameter for token refresh (@chemelli74
- #52785 ) (neato docs) - Add the Trane brand to nexia (@bdraco
- #52805 ) (nexia docs) - Bump python-fireservicerota to 0.0.42 (@cyberjunky
- #52807 ) (fireservicerota docs) - Bump up ZHA depdencies (@Adminiuga
- #52818 ) (zha docs) - Update arcam lib to 0.7.0 (@elupus
- #52829 ) (arcam_fmj docs) - Bump aiohomekit to 0.5.1 to solve performance regression (@bdraco
- #52878 ) (homekit_controller docs) - Bump pyhaversion to 21.7.0 (@ludeeus
- #52880 ) (version docs) - Prefer using xy over hs when supported by light (@Kane610
- #52883 ) (deconz docs) - Bump zwave-js-server-python to 0.27.1 (@raman325
- #52885 ) (zwave_js docs) - Surepetcare, fix set_lock_state (@Danielhiversen
- #52912 ) (surepetcare docs) - Bump pyinsteon to 1.0.11 (@teharris1
- #52927 ) (insteon docs) - Fix recorder purge with sqlite3 < 3.32.0 (@bdraco
- #52929 ) - Bump pysonos to 0.0.52 (@jjlawren
- #52934 ) (sonos docs)
Release 2021.7.3 - July 16
- Update ZHA to support zigpy 0.34.0 device initialization (@puddly
- #52610 ) (zha docs) - copy() –> deepcopy(). (@janiversen
- #52794 ) (modbus docs) - only allow one active call in each platform. (@janiversen
- #52823 ) (modbus docs) - Bump pyatv to 0.8.1 (@doug-hoffman
- #52849 ) (apple_tv docs) - Handle dhcp packets without a hostname (@bdraco
- #52882 ) (dhcp docs) - Add OUIs for legacy samsungtv (@bdraco
- #52928 ) (samsungtv docs) - Bump python-fireservicerota to 0.0.43 (@cyberjunky
- #52966 ) (fireservicerota docs) - More graceful exception handling in Plex library sensors (@jjlawren
- #52969 ) (plex docs) - Fix issue connecting to Insteon Hub v2 (@teharris1
- #52970 ) (insteon docs) - Bump pysma to 0.6.4 (@rklomp
- #52973 ) (sma docs) - Update pyrainbird to 0.4.3 (@peternijssen
- #52990 ) (rainbird docs) - Bump pypck to 0.7.10 (@alengwenus
- #53013 ) (lcn docs) - fix for timestamp not present in SIA (@eavanvalkenburg
- #53015 ) (sia docs) - Co2signal, set SCAN_INTERVAL (@Danielhiversen
- #53023 ) (co2signal docs) - Another SIA fix for timestamp not present. (@eavanvalkenburg
- #53045 ) - Fix knx expose feature not correctly falling back to default value (@da-anda
- #53046 ) (knx docs) - Expose Spotify as a service (@balloob
- #53063 ) - Increase polling interval to prevent reaching daily limit (@vlebourl
- #53066 ) (home_plus_control docs) - Add light white parameter to light/services.yaml (@emontnemery
- #53075 ) (light docs)
Release 2021.7.4 - July 21
- Allow pymodbus to reconnect in running system (not startup) (@janiversen
- #53020 ) (modbus docs) - Fix groups reporting incorrect supported color modes (@Kane610
- #53088 ) (deconz docs) - Handle all WeMo ensure_long_press_virtual_device exceptions (@esev
- #53094 ) (wemo docs) - Fix remote rpi gpio input type (@jgriff2
- #53108 ) (remote_rpi_gpio docs) - More restrictive state updates of UniFi uptime sensor (@Kane610
- #53111 ) (unifi docs) - Bump simplisafe-python to 11.0.2 (@bachya
- #53121 ) (simplisafe docs) - Bump nexia to 0.9.10 to fix asair login (@bdraco
- #53122 ) (nexia docs) - Bump surepy to 0.7.0 (@benleb
- #53123 ) (surepetcare docs) - Upgrade pysonos to 0.0.53 (@amelchio
- #53137 ) (sonos docs) - Correctly detect is not home (@balloob
- #53279 ) (device_tracker docs) - Upgrade to async-upnp-client==0.19.1 (@StevenLooman
- #53288 ) (dlna_dmr docs) (ssdp docs) (upnp docs) - Fix homekit locks not being created from when setup from the UI (@bdraco
- #53301 ) (homekit docs)
If you need help…
…don’t hesitate to use our very active forums or join us for a little chat
Experiencing issues introduced by this release? Please report them in our issue tracker
Community Highlights: 27th edition
The 27th edition of the Home Assistant Community Highlights! Some interesting things popped up around our community, which we thought was worth sharing.
But first I have one more announcement. My internship is (almost) over and I’m happy to say that I passed and completed it with a good grade. That also means that this community highlight is the last one from me as an intern, time will tell when the next one will appear.
Do you want to share something for the next edition? Information on how to share.
./Klaas
Intern on Home Assistant Energy
Blueprint of the week
This week’s blueprint is that of bfranke1973, who has created a blueprint with which you can receive a notification when a device loses connection with the network. Try it out! Read more about it on the community forum or install this automation in your instance with a click on the My button!
Love Lock Card
Do you ever accidentally turn on a light or switch? Then try the
love lock card
Lovelace Dashboard
This week again we have a new Lovelace dashboard for the necessary portion
of inspiration 😄 This time the one from swake88
Would you also like your dashboard to be in the community highlight? Drop it
on Reddit
Statistic Tools
Home Assistant has a number of tools for working with statistics, but the
question is how can you best approach this. Carlos
Got a tip for the next edition?
Have you seen (or made) something awesome, interesting, unique, amazing, inspirational, unusual or funny, using Home Assistant?
Click here to send us your Community Highlight suggestion.
Also, don’t forget to share your creations with us via Social Media:
- Tweet it! Be sure to mention @home_assistant
- Share it on our Facebook group
- Post it to our subreddit
- Tag @homeassistant
on Instagram - Or via chat, drop us a line in the #lounge at Discord
See you next edition!
Community Highlights: 26th edition
The 26th edition of the Home Assistant Community Highlights! Some interesting things popped up around our community, which we thought was worth sharing.
Do you want to share something for the next edition? Information on how to share.
./Klaas
Intern on Home Assistant Energy
Power-up your ESPHome Projects
Speaking of interesting stuff, have you seen what cool new stuff has come to
ESPHome
Blueprint of the week
This week’s blueprint is that of danielbook, who created a blueprint that turns on the lights of a room based on a motion and brightness sensor. You will no longer be in the dark when you get home 😉 Try it out! Read more about it on the community forum or install this automation in your instance with a click on the My button!
Floor3D Card
Last time we shared a dashboard with floorplan, this time the
floor3D card
Lovelace Dashboard
This week again we have a new Lovelace dashboard for the necessary portion
of inspiration 😄 This time the one from suckfail
Would you also like your dashboard to be in the community highlight? Drop it
on Reddit
Chore Tracker
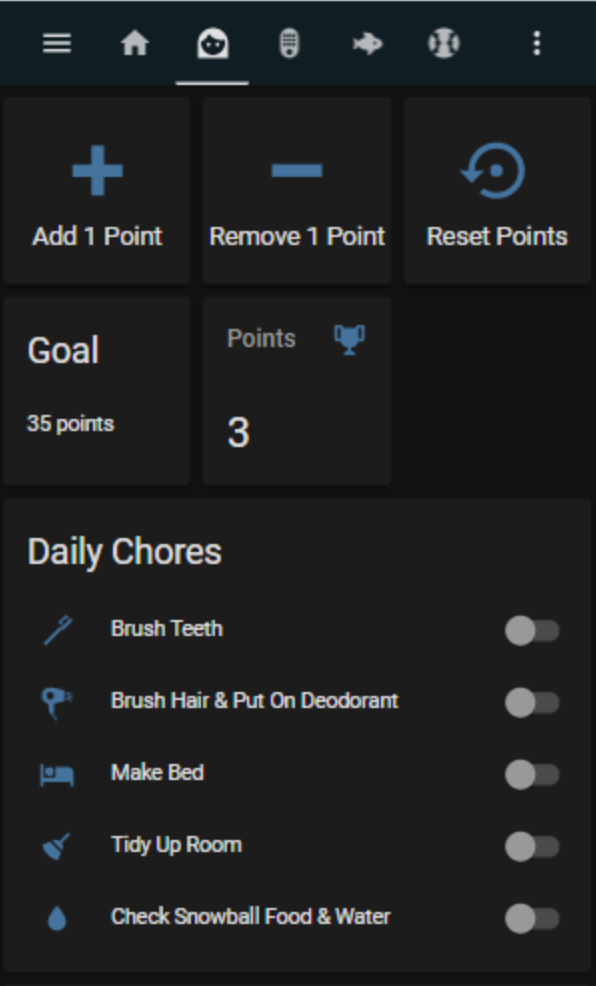
Are you tired of doing those household chores all the time, or do the kids just don’t want to unload the dishwasher? Make it more fun with the chores tracker made by djbrooks022, where you can earn points for every chore you complete!
Do you want to get started? Then find all the information here.
Got a tip for the next edition?
Have you seen (or made) something awesome, interesting, unique, amazing, inspirational, unusual or funny, using Home Assistant?
Click here to send us your Community Highlight suggestion.
Also, don’t forget to share your creations with us via Social Media:
- Tweet it! Be sure to mention @home_assistant
- Share it on our Facebook group
- Post it to our subreddit
- Tag @homeassistant
on Instagram - Or via chat, drop us a line in the #lounge at Discord
See you next edition!
Power-up your ESP8266 and ESP32 projects: browser-based installation and configure Wi-Fi via Bluetooth LE
ESP8266 and ESP32 are microcontrollers made by the Chinese company Espressif. Microcontrollers are teeny tiny computers with little processor power, memory and space that can interact with sensors, send infrared commands and many other things.
With the ESP devices Espressif has achieved something formidable: their devices
have Wi-Fi, are compatible with code for the popular Arduino microcontroller
and they are cheap. Like, $5-including-shipping-from-China-cheap
(AliExpress
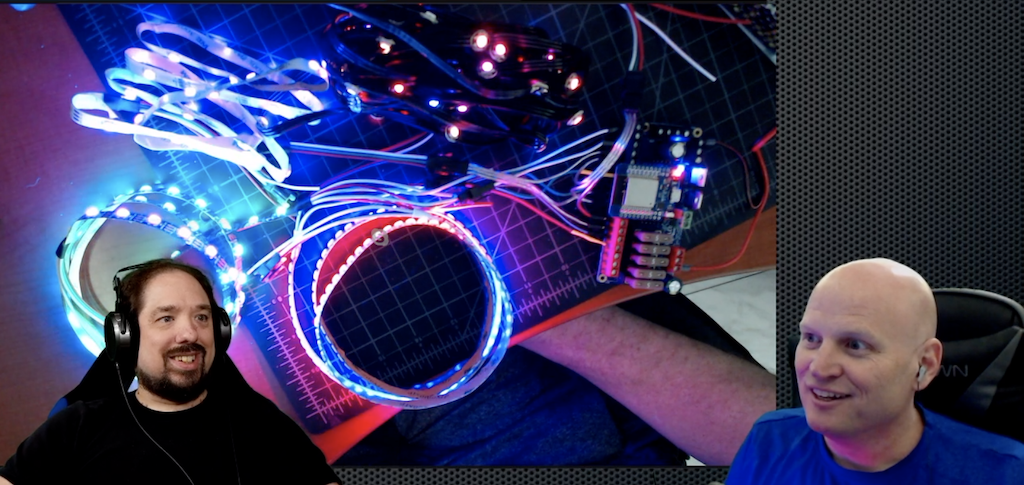 Quindor and DrZzs playing with an ESP32-based QuinLED running WLED
(YouTube
Microcontrollers are just computers and so are nothing without their software.
Open source software like ESPHome
But these projects all have a common problem: it is difficult to get started. We identified three pain points:
- Installing the software on the microcontroller.
- Connecting the microcontroller to your wireless network.
- Configure the software on the microcontroller.
These pain points stand in the way for creators to reach a wider audience. It’s our mission to make local home automation succeed, and these projects, and all the possibilities that they unlock, are an important part of this.
Today, we are introducing some things to make using microcontrollers easier.
Using terms everybody understands
We are going to start using words that a user understands instead of forcing the technical terms on them. Terms like “firmware” and “flashing” are the correct terminology but for inexperienced users they do more harm than good. They will make the user feel uncomfortable before they even start.
So instead of “upload firmware” we’ve updated the ESPHome dashboard to talk about “installing”. We are encouraging other projects to do the same.
Things will get more technical as a user continues playing with microcontrollers. But this change might just be that little thing why they will actually continue.
ESP Web Tools: Installing projects on your microcontroller via the browser
We have created ESP Web Tools
This works for both the ESP8266 and ESP32 and with any project for these devices. This technology is powered by Web Serial, a web standard for serial communication that is part of Google Chrome and Microsoft Edge.
ESP Web Tools Web has already been adopted as part of the onboarding by
WLED
Learn how to add ESP Web Tools to your website
If you have an ESP32 or ESP8266 device handy, you can try it out right here:
ESP Web Tools uses code
Note: We don’t like to use technology that is not available in all browsers and cannot be made available in other ways. However, in this case the benefits outweigh the cons. We hope that Firefox and WebKit add support for Web Serial in the future.
Improv Wi-Fi: Open standard to provision Wi-Fi credentials via Bluetooth Low Energy
We have created Improv Wi-Fi

For open source firmware there are two popular ways of getting a device to connect to your wireless network. The device sets up a wireless network and you need to connect to it via your phone or laptop, or the user compiles the network and password into the firmware before installing it on the ESP. Both methods are difficult and error prone, they offer a bad user experience.
If you look at off-the-shelf products, you see another approach: send Wi-Fi credentials to the device via Bluetooth Low Energy (BLE). BLE allows the user to get instant feedback if something goes wrong. This technology is used in many products, but there is no open standard that is free to implement. Improv Wi-Fi is an open standard that is free to implement.
Open source projects often host their control interface as a website on the ESP device. Improv Wi-Fi supports this and when provisioning is done, the user can be redirected to a URL to finish onboarding.
Improv Wi-Fi can be used today to provision ESP32 microcontrollers running
ESPHome
Improv Wi-Fi is also available for the web in the form of a button that can be added to your website. This will allow users to configure and set up a device from any browser that supports Web Bluetooth.
If you’ve used the installation button in the previous section but have not yet connected it to the wireless network, you can onboard that device here:
ESPHome Dashboard: simplified and streamlined
With ESPHome
# Example ESPHome configuration
sensor:
  - platform: dht
    pin: D2
    temperature:
      name: "Living Room Temperature"
    humidity:
      name: "Living Room Humidity"
    update_interval: 60s

The ESPHome Dashboard has been updated with a simplified and streamlined wizard for new configurations. You now enter the name of your project and your Wi-Fi credentials and it will install it on your ESP device via the browser. After that all further updates will happen wirelessly.
ESPHome: embracing projects
We want to make it easy for creators to sell ESPHome powered products that offer a great user experience. ESPHome projects embrace local control and integrate nicely with Home Assistant, and so each extra ESPHome product that our users can buy is a win.
To make it easier to keep creators and users connected once a product is
installed, projects can now add a project identifier and version to their
firmware (docs
The goal is to integrate the projects tighter into the ESPHome dashboard by showing the project’s logo, link to the documentation and issue pages and allow installing updates.
Why we build this
Home Assistant’s mission is to make local home automation a viable alternative to cloud based solutions and accessible to everyone.
To make this mission a reality, we started the company Nabu Casa. Together with the community, Nabu Casa develops Home Assistant and ESPHome and is funded solely by people that support this mission. No investors or loans.
If you want to help fund our work, subscribe to Home Assistant Cloud
Community Highlights: 25th edition
The 25th edition of the Home Assistant Community Highlights! Some interesting things popped up around our community, which we thought was worth sharing.
Also, keep an eye out for the ESPHome release next week Wednesday. We’re going to have some great announcements!
Do you want to share something for the next edition? Information on how to share.
./Klaas
Intern on Home Assistant Energy
Blueprint of the week
Are there more people who turn their lights on and off at certain times when they go on holiday?
This week’s blueprint is that of timgiwo, who created a blueprint that can repeat the behavior of your lights from the past week, so it seems like you are still at home. Try it out! Read more about it on the community forum or install this automation in your instance with a click on the My button!
Slider Button Card
Mattieha
Floorplan Dashboard
This week again we have a new Lovelace dashboard for the necessary portion
of inspiration 😄 This time the one from theone11
Would you also like your dashboard to be in the community highlight? Drop it
on Reddit
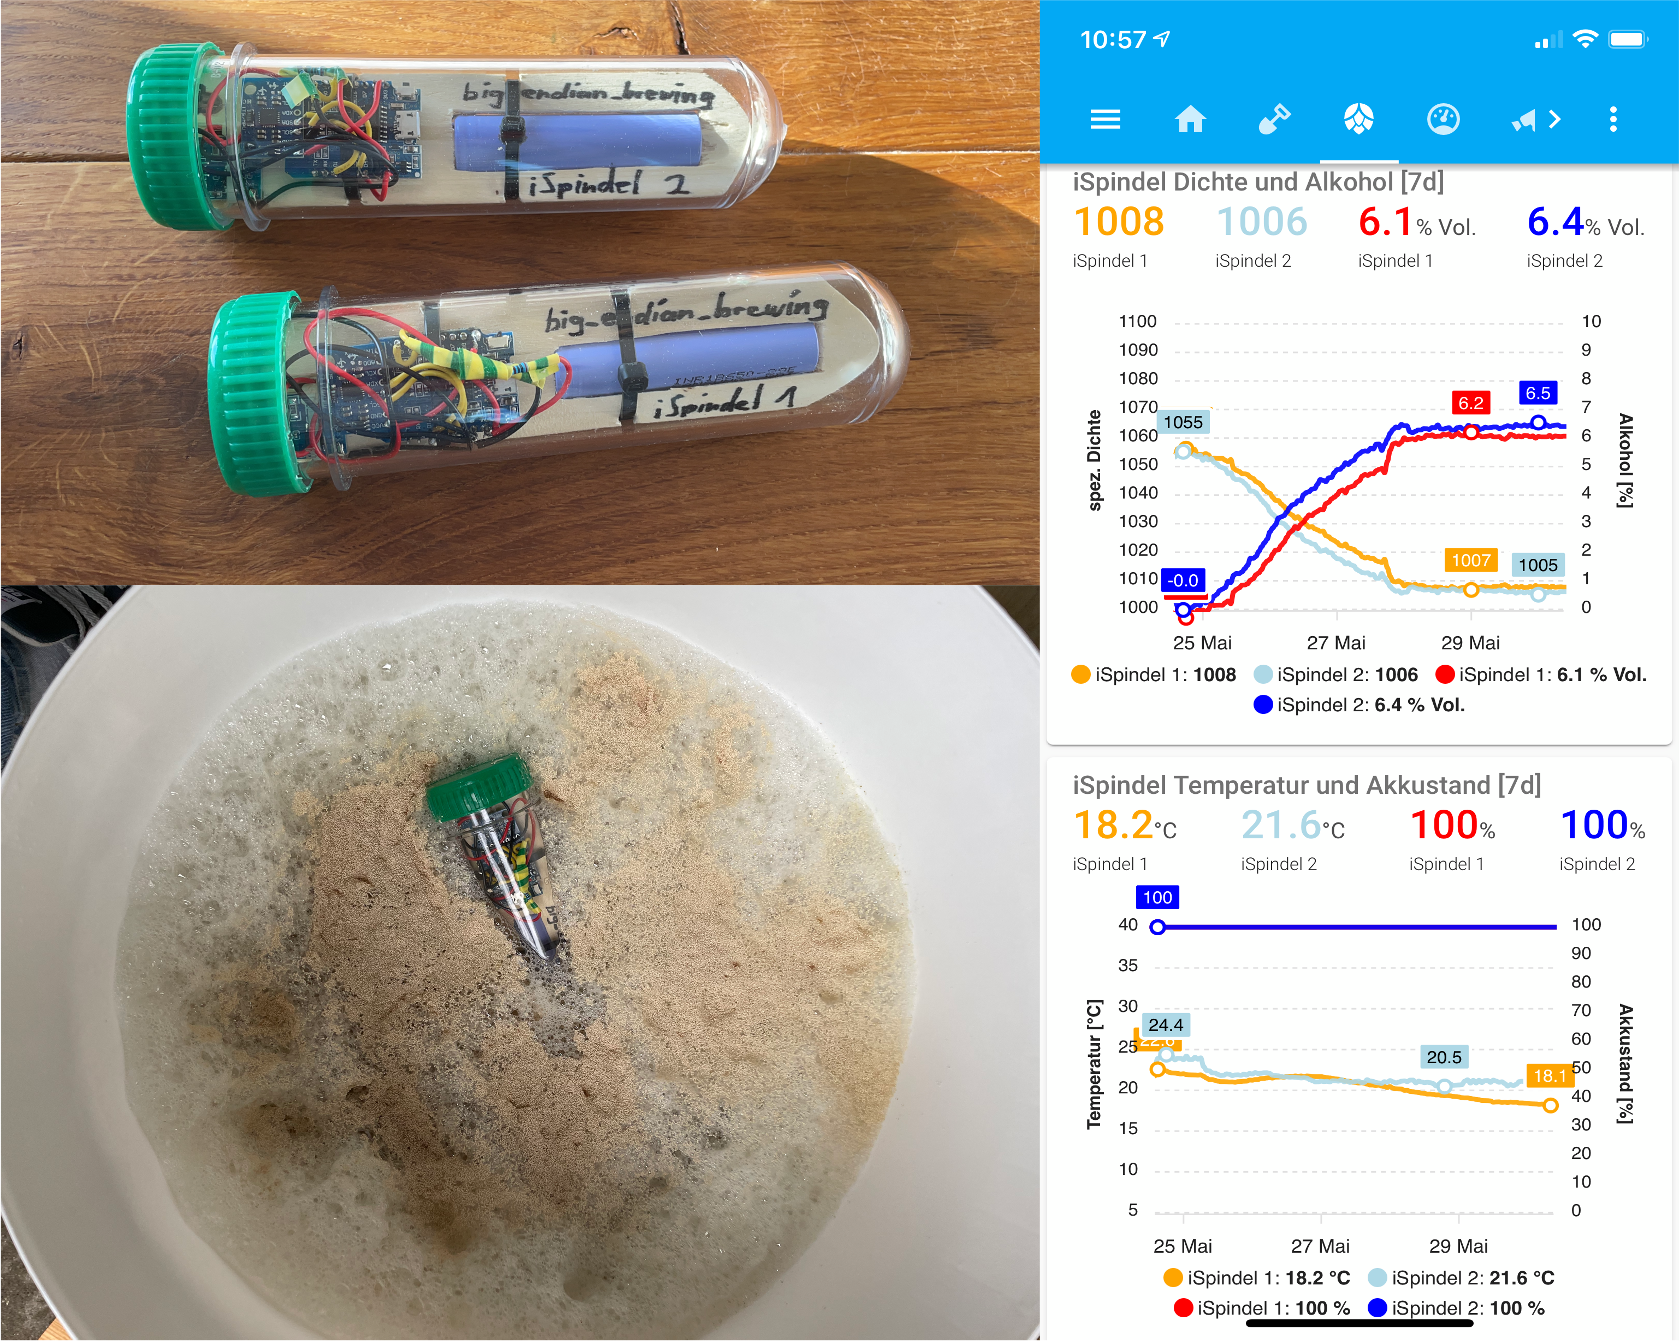
Ispindel
Between the community submissions, we came across a nice project
Got a tip for the next edition?
Have you seen (or made) something awesome, interesting, unique, amazing, inspirational, unusual or funny, using Home Assistant?
Click here to send us your Community Highlight suggestion.
Also, don’t forget to share your creations with us via Social Media:
- Tweet it! Be sure to mention @home_assistant
- Share it on our Facebook group
- Post it to our subreddit
- Tag @homeassistant
on Instagram - Or via chat, drop us a line in the #lounge at Discord
See you next edition!
Home Assistant OS Release 6

Home Assistant OS 6.0 stable is available now!
Highlights:
-
OS Agent for better OS integration with Supervisor
-
Support for additional Wi-Fi and Bluetooth devices
-
Smaller virtual machine disk images
-
Improved: Generic x86-64 system support
Table of contents
Operating System Changes
OS Agent
Operating System release 6 comes with a new, Go written daemon called OS Agent. This allows the Supervisor to access more aspects of the OS. One such aspect is to move the data to an external data disk or wipe data to start over without reinstalling. Note however that at this point, the required logic in the Supervisor and Frontend is still being developed.
Under the Hood
Under the hood, the OS was updated to the latest upstream Linux 5.10 kernel as well as Buildroot 2021.02.1. The latest Buildroot release brings tons of new software versions along with bug and security fixes. Some key components which received an update were systemd 247 and the Docker Container Engine 20.10.6.
Other Changes
- The short name of the OS used throughout the software stack was renamed to “haos”. From a users perspective not much changes, but it leads to new file names.
- The Home Assistant CLI is now started on tty1 instead of the login prompt. The HA CLI banner shows the IP and other device information without the need to attach a keyboard to login.
- The default shell of the root user is now the Busybox ash. This allows to use scp and similar tools using SSH.
- The system start is now delayed until the system time has been synchronized with an NTP server. This avoids connection issues to SSL/TLS enabled servers when the system time is off. In practice, the delay should only be a few seconds. The system proceeds with startup after 90s in case the NTP server was not reachable (e.g. if no Internet connectivity is available).
Device Support
Raspberry Pi
All Raspberry Pi versions were updated to use the Linux Kernel 5.10 from the Raspberry Pi team, just like Raspberry Pi OS. The latest Bluetooth firmware for CYW43455 (Raspberry Pi 3 B+/4) with security fixes is now part of the Raspberry Pi images.
Generic x86-64
In Home Assistant OS 6 the board/image “Intel NUC” was renamed to “Generic x86-64”. Existing “Intel NUC” installation will automatically migrate to the “Generic x86-64” image on update.
Already with OS 5 the “Intel NUC” image was usable for most UEFI capable x86-64 systems. With the rename that fact is emphasized. Home Assistant OS is open to changes to add drivers to extend support for other x86-64 platforms. However, keep in mind that we don’t have access to all x86-64 hardware, so support for devices is on a best effort basis.
Other Changes:
-
The Intel IGC network driver supports Intel network cards such as I225-LM/I225-V used on some newer Intel NUC devices.
-
With Home Assistant OS 6 the latest version of the Barebox bootloader 2021.05.0 which fixes boot from hard disks larger than 2TB.
-
The ACPI kernel driver for Thinkpad devices is enabled.
Open Virtualization Appliance
The virtual disk images are now built from a sparse file as source, which leads to smaller effective disk image sizes. Disk images are now also distributed in the more common zip file format (except the qcow2 images which are mostly used on Linux, they continue to be in the xz compression format).
By default, the image now has a serial console enabled which is useful to access Home Assistant OS on headless host systems.
Additional Wi-Fi and Bluetooth Device Support
Ralink rt27xx/rt28xx/rt30xx, as well as Realtek 87xx/88xx devices, are now supported on boards that don’t have onboard Wi-Fi/Bluetooth. This is also true for the OVA image for virtualized environments (when using hardware passthrough functionality). For the OVA image, also Intel firmwares are now part of the image so that Intel Wi-Fi/Bluetooth devices can be used in passthrough mode as well.
Homematic IP Support
@jens-maus
Google Coral PCIe AI Accelerator Support
@ryddler
That’s all Folks! Now go out and update!
Community Highlights: 24th edition
The 24th edition of the Home Assistant Community Highlights! Some interesting things popped up around our community, which we thought was worth sharing.
Do you want to share something for the next edition? Information on how to share.
./Klaas
Intern on Home Assistant Energy
Blueprint of the week
I think this situation is familiar to many parents: your children who get out of bed too early and who you would like to learn when it is the right time to get out of bed.
This week’s blueprint is that of koosvanw, who created a blueprint for the above situation that works with a light that can change color and where the brightness can also be adjusted. Try it out! Read more about it on the community forum or install this automation in your instance with a click on the My button!
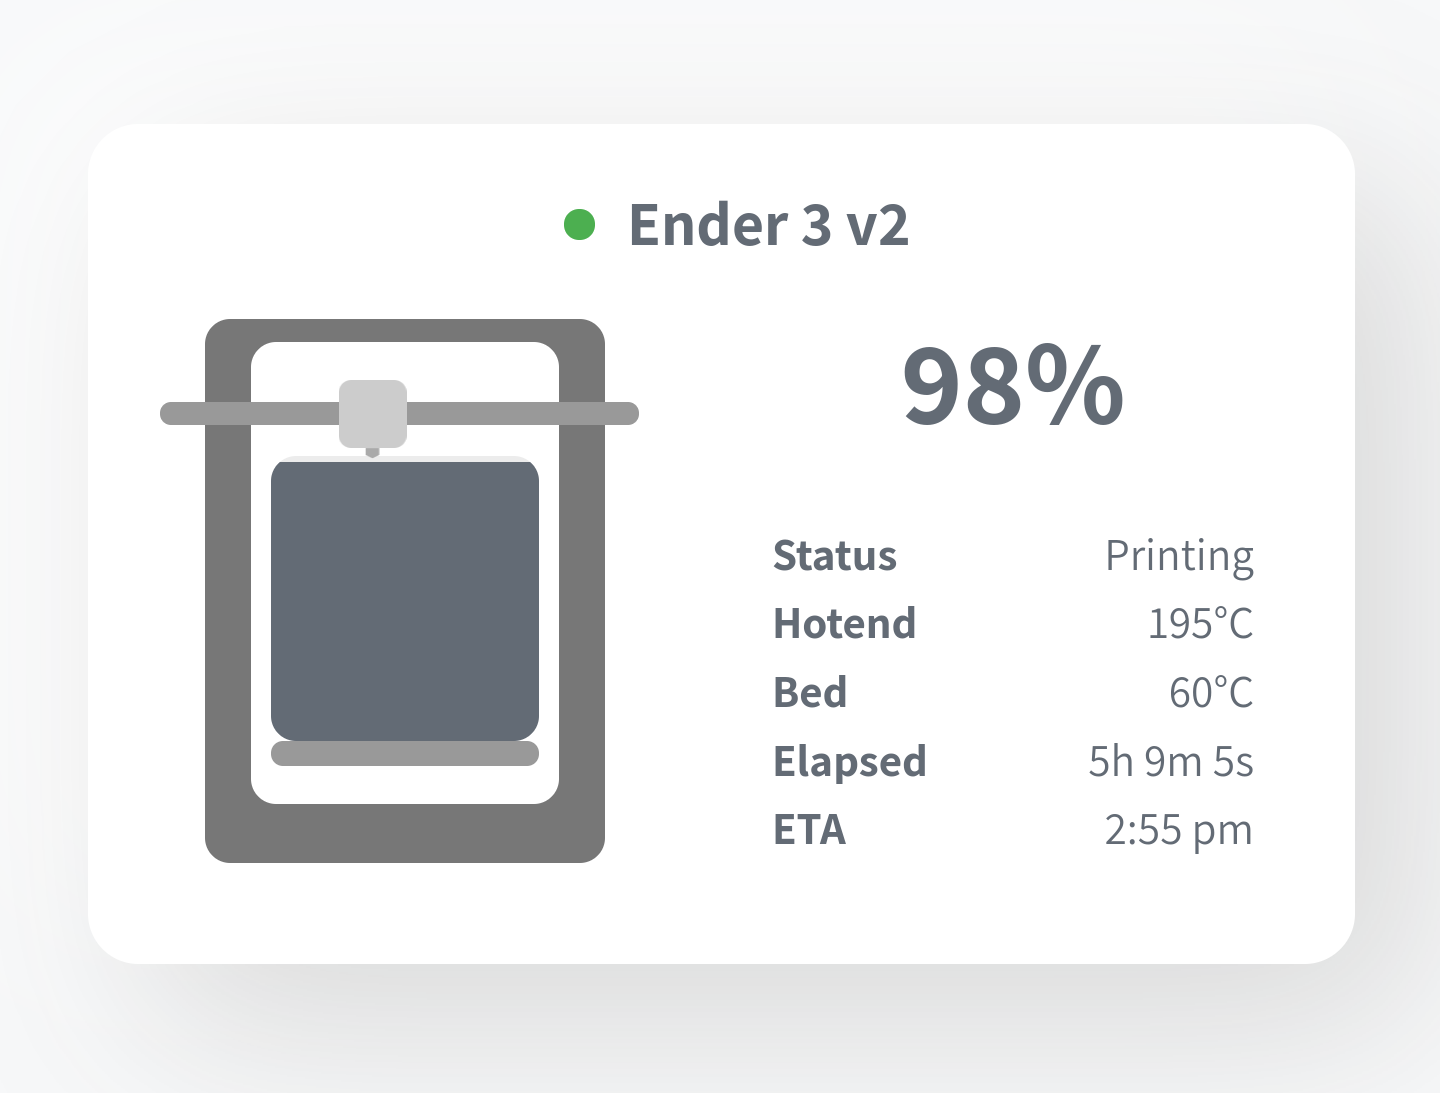
Threedy card
Do you have a 3D printer and are you not quite sure how to display it in a
beautiful way in your Lovelace dashboard? Then try this card from
dangreco
ESPHome weather station
Have you always wanted to build a weather station in your garden? Then
try the ESPHome variant of hugokernel
Garage fingerprint
This week we also came across something cool that was shared on our subreddit
Do you want to know more about it? Then also check this forum topic.
Got a tip for the next edition?
Have you seen (or made) something awesome, interesting, unique, amazing, inspirational, unusual or funny, using Home Assistant?
Click here to send us your Community Highlight suggestion.
Also, don’t forget to share your creations with us via Social Media:
- Tweet it! Be sure to mention @home_assistant
- Share it on our Facebook group
- Post it to our subreddit
- Tag @homeassistant
on Instagram - Or via chat, drop us a line in the #lounge at Discord
See you next edition!
2021.6: A little bit of everything
A little bit of everything. That is probably the best way to describe this release. It is a packed release, with a lot of small new features everywhere!
Sonos got quite a bit of love, Hue now supports push updates, the UI has a lot of usability tweaks, MQTT added quite a few attributes, themes can now support modes… seriously, I can go on forever with this list.
So, no new big features (something might be cooking for the next release…), but a nice release that has something for everybody. Definitely worth scanning the all changes section for your favorite integrations.
../Frenck
- Support for custom Dark mode themes
- Collapsed attributes
- Time format settings
- Disable polling updates on any integration
- Network integration
- Other noteworthy changes
- New Integrations
- New Platforms
- Integrations now available to set up from the UI
- Release 2021.6.1 - June 3
- Release 2021.6.2 - June 4
- Release 2021.6.3 - June 7
- Release 2021.6.4 - June 11
- Release 2021.6.5 - June 15
- Release 2021.6.6 - June 20
- If you need help…
- Backward-incompatible changes
- Farewell to the following
- All changes
Support for custom Dark mode themes
Previously, all themes automatically used our light theme as the base to build on. As of today, themes can be based on our default dark theme as well!
Not only that, @spacegaier
 Screenshot of a custom theme supporting both light & dark mode.
If you are a theme developer, you can find more information on how this works in the frontend documentation.
Oh, and of course, all your existing themes will still just work as before.
Collapsed attributes
Some entities provide quite a few attributes and those show up in the user interface. Most of the time, you don’t need to those and often contain technical data that only confuse or clutter.
To unclutter the more information entity dialog from these attributes a bit, the attributes will now show up collapsed into a bar and can be revealed with a click.
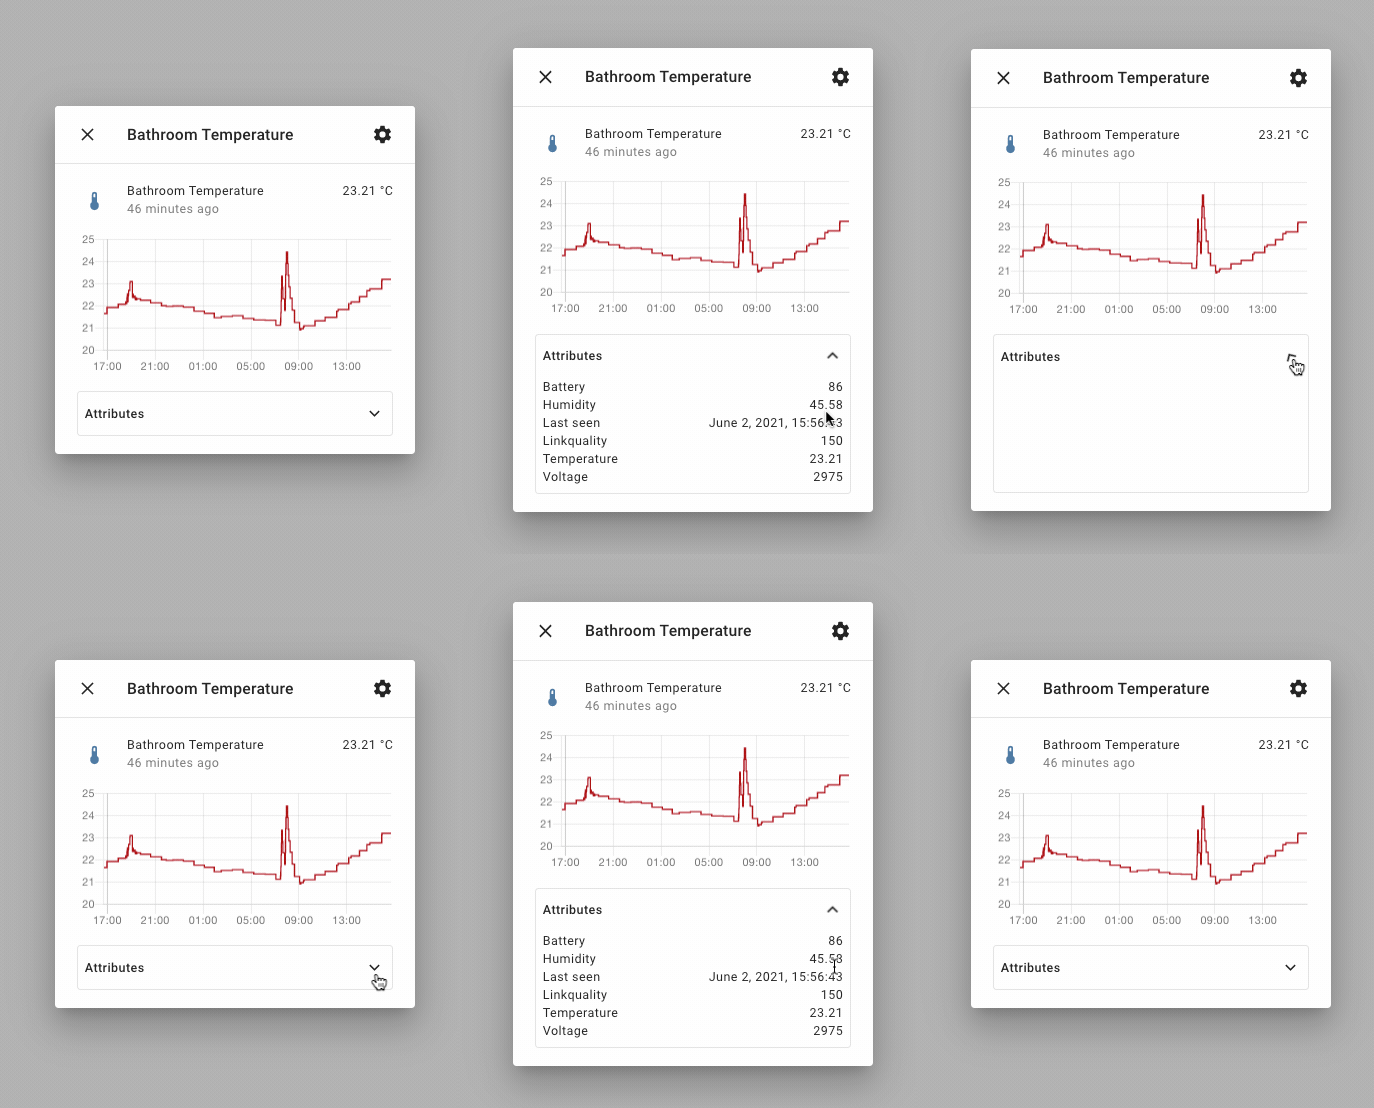 Screen recording of the collapsible entity attributes.
Time format settings
A couple of releases back, we added the possibility to select the number format that Home Assistant uses when showing numbers. Awesome! But… what about the formatting of time?
That question was raised a lot that release and many of you requested the same feature for time formatting, for example, if one prefers a 24-hour format.
Well, you can thank @spacegaier
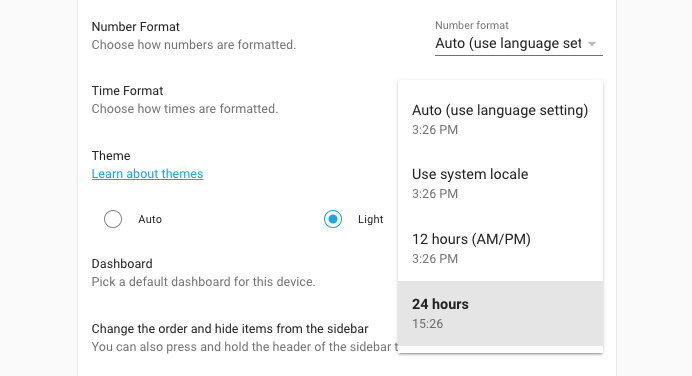 Screenshot of new time format setting.
You can find this new setting in your user profile.
Disable polling updates on any integration
One returning feature request, for many integrations, is adding controls for tuning the polling interval an integration uses.
For example, if an integration has an API that needs to be paid for and you don’t need too many updates, it can be a cost saver to use a slower polling interval.
Another often requested example is things like battery-powered devices, or maybe a device you only want to poll during the day and not during the night.
This release, we add support for disabling polling on every integration via the integration system options; for ALL integrations.
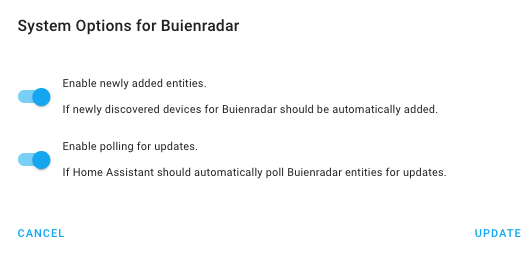 Screenshot of the system options of an integration showing the disable polling option.
Wait? Disable polling?! Yes :)
So, there are many different requests on, for example, changing polling rates (also known as scan interval), but also requests for polling on a schedule, or, only based on other input (e.g., triggered by a motion sensor).
Therefore, we decided to provide the maximum flexibility for any use case you
can come up with. Disabling polling makes Home Assistant stop polling
automatically. However, you can use the
homeassistant.update_entity
service on those entities to trigger a poll for information.
This means, once you’ve disabled polling for an integration, you can create automations and completely customize when you poll that integration from that point on. All based on your own schedule, conditions or triggers.
Network integration
This release adds a new Network integration, created by @bdraco
It also provides you a single place to tell Home Assistant about your network. It is an advanced feature and thus will only show up if you have advanced mode enabled on your user profile.
You probably don’t need to change these settings, by default, Home Assistant will auto-detect the right configuration. However, if you have a more complex network configuration, with multiple network adapters or VLANs, you can now select the interface Home Assistant integrations should use.
 Screenshot of new Home Assistant Network settings in the general configuration.
Please note that this is a new feature that needs to be implemented/used by other integrations. At this point, not all integrations will honor these settings yet.
Other noteworthy changes
There is much more juice in this release; here are some of the other noteworthy changes this release:
- The Modbus has been receiving lots and lots of love from @janiversen
, a big shout out to him for continuously improving it for the past weeks! - The Hue integration now supports push updates! Blazing fast response times if you are using that platform.
-
@balloob
and @bdraco have been working on replacing date/time/timezone handling in Home Assistant. Right on time. - All services, for all integrations, now have updated information for their
service calls. This means all service calls now have a nice new UI.
Amazing job @tkdrob
! - Support for the new colors modes is slowly expanding. This release Elgato, Z-Wave JS, KNX and MQTT have added support.
- Sonos got some love from @mountainsandcode
, @AaronDavidSchneider and @jjlawren . A lot of fixes and improvements, but also added support for controlling the state of the hardware buttons and controlling your Sonos alarms! - The developer state tools, now shows the
name of the entity additional to the entity ID. Searching/filtering the list
now supports wildcards (
*). Thanks, @spacegaier! - Thanks to @PeteBa
, there is now a recorder.purge_entitiesservice that allows you to purge data from the recorder database for specified entities. - Watson TTS has added a bunch of new voices to choose from, thanks @demikl
! - Ding dong! @bdraco
added support for doorbell buttons to the HomeKit Controller integration. - BMW Connected Drive, now provides a bunch of sensors about your last trip.
Thanks, @EddyK69
! -
@emericklaw
added a new feature that allows you to duplicate a scene! - My Home Assistant now supports linking to the Ingress interface of an add-on!
- Light templates now have support for effects, transitions and a bunch
more properties, thanks to @jacekpaszkowski
! - VeSync now supports Etekcity light bulbs, thanks @sdrapha
. - The universal media player now supports overriding a lot of commands! Thanks
for adding that @Drafteed
! -
@mdz
continues expanding the SmartTub integration adding service to change filtration settings and snoozing reminders. - The Elgato integration now supports the new Elgato LED strips.
- If you are into Oracle DB, @mciupak
made sure our recorder can now use that. - Z-Wave JS integration now shows progress when adding or re-interviewing a
device. Thanks, @cgarwood
! - The Nexia integration now also supports controlling American Standard
thermostat, added by @bdraco
. -
@Drafteed
added support for changing channels on your LG NetCast TV, thanks! -
@mib1185
ensured that the UX for counters and number helpers look nice!
New Integrations
We welcome the following new integrations this release:
-
Bosch Smart Home Controller, added by @tschamm
-
Garages Amsterdam, added by @klaasnicolaas
-
Kraken, added by @eifinger
-
Meteoclimatic, added by @adrianmo
-
Nettigo Air Monitor, added by @bieniu
-
Network configuration, added by @bdraco
-
SIA Alarm Systems, added by @eavanvalkenburg
-
Syncthing, added by @zhulik
-
System Bridge, added by @timmo001
-
Wallbox, added by @hesselonline
New Platforms
The following integration got support for a new platform:
-
Goal Zero Yeti now has switches to control outlets, added by @tkdrob
-
OmniLogic added switches to control relays and pumps, done by @djtimca
-
Mazda Connected Services can now control locks, thanks to @bdr99
-
AVM FRITZ!Box Tools added a binary sensor to indicate connectivity and
sensors for uptime and external IP. Added by @chemelli74
-
Modbus now supports lights & fans, added by @vzahradnik
-
Sonos now has switches to control enable/disable alarms,
added by @AaronDavidSchneider
Integrations now available to set up from the UI
The following integrations are now available via the Home Assistant UI:
-
Buienradar, done by @RobBie1221
-
Growatt, done by @indykoning
Release 2021.6.1 - June 3
- Fix last activity consideration for AVM Fritz!Tools device tracker (@mib1185
- #51375 ) (fritz docs) - Handle Sonos connection issues better when polling (@jjlawren
- #51376 ) (sonos docs) - Fix no value error for heatit climate entities (@raman325
- #51392 ) (zwave_js docs) - Fix Tibber Pulse device name and sensor update (@Danielhiversen
- #51402 ) (tibber docs) - Fix shopping list “complete all” service name (@spacegaier
- #51406 ) (shopping_list docs) - Bump aiohomekit to 0.2.67 (fixes #51391) (@Jc2k
- #51418 ) (homekit_controller docs) - Bump zwave-js-server-python to 0.26.1 (@raman325
- #51425 ) (zwave_js docs) - Update frontend to 20210603.0 (@bramkragten
- #51442 ) (frontend docs)
Release 2021.6.2 - June 4
- Hot fix version of Apply modbus interval patch (@balloob
- #51487 ) (modbus docs) - Update to iaqualink 0.3.90 (@flz
- #51452 ) (iaqualink docs) - Retry isy994 setup later if isy.initialize times out (@bdraco
- #51453 ) (isy994 docs) - xknx 0.18.3 (@farmio
- #51277 ) (knx docs) - Update xknx to version 0.18.4 (@farmio
- #51459 ) (knx docs) - Bump aiolyric to 1.0.7 (@timmo001
- #51473 ) (lyric docs) - Improve logging for SamsungTV (@chemelli74
- #51477 ) (samsungtv docs) - Upgrade elgato to 2.1.1 (@frenck
- #51483 ) (elgato docs) - Protect our user agent (@balloob
- #51486 )
Release 2021.6.3 - June 7
- Use a single job to ping all devices in the Broadlink integration (@felipediel
- #51466 ) (broadlink docs) - Fix loop in tod binary sensor (@bdraco
- #51491 ) (tod docs) - AsusWRT fix keyerror when firmver is missing from info (@timmo001
- #51499 ) (asuswrt docs) - Handle missing options in foreign_key for MSSQL (@bdraco
- #51503 ) (recorder docs) - Fix missing Tibber power production (@Danielhiversen
- #51505 ) (tibber docs) - Bump garminconnect_aio to 0.1.4 (@cyberjunky
- #51507 ) (garmin_connect docs) - Bump pyialarm to 1.8.1 (@RyuzakiKK
- #51519 ) (ialarm docs) - Improve log message when zone missing in geolocation trigger (@exxamalte
- #51522 ) (geo_location docs) - Ensure host is always set with samsungtv SSDP discovery (@bdraco
- #51527 ) (samsungtv docs) - Bump aiorecollect to 1.0.5 (@bachya
- #51538 ) (recollect_waste docs) - Fix garmin_connect config flow multiple account creation (@cyberjunky
- #51542 ) (garmin_connect docs) - Bump dwdwfsapi to 1.0.4 (@stephan192
- #51556 ) (dwd_weather_warnings docs) - Increase isy setup timeout to 60s (@bdraco
- #51559 ) (isy994 docs) - Fix Sonos restore calls (@jjlawren
- #51565 ) (sonos docs) - Update builder to 2021.06.2 (@pvizeli
- #51582 ) - Fix deprecated value_template for MQTT light (@emontnemery
- #51587 ) (mqtt docs)
Release 2021.6.4 - June 11
- Fix Sonos battery sensors on S1 firmware (@jjlawren
- #51585 ) (sonos docs) - Handle missing section ID for Plex clips (@jjlawren
- #51598 ) (plex docs) - Reduce ovo_energy polling rate to be less aggressive (@blastoise186
- #51613 ) (ovo_energy docs) - Do not configure Shelly config entry created by custom component (@bieniu
- #51616 ) (shelly docs) - Fix Onvif get_time_zone from device (@pszafer
- #51620 ) - Ensure samsungtv reloads after reauth (@bdraco
- #51714 ) (samsungtv docs) - Fix race condition in samsungtv turn off (@bdraco
- #51716 ) (samsungtv docs)
Release 2021.6.5 - June 15
- Replace garminconnect_aio with garminconnect_ha (@cyberjunky
- #51730 ) (garmin_connect docs) - Bump pydaikin, fix airbase issues (@fredrike
- #51797 ) (daikin docs) - Add httpcore with version 0.13.3 (@ludeeus
- #51799 ) - Bump pyialarm to 1.9.0 (@RyuzakiKK
- #51804 ) (ialarm docs)
Release 2021.6.6 - June 20
- Fix whois expiration date (@kantselovich
- #51868 ) (whois docs) - Add Omnilogic switch defaults for max_speed and min_speed (@djtimca
- #51889 ) (omnilogic docs) - Bump pyRFXtrx to 0.27.0 (@RobBie1221
- #51911 ) (rfxtrx docs) - Bump pydaikin to 2.4.3 (@fredrike
- #51926 ) (daikin docs) - Fix AccuWeather sensors updates (@bieniu
- #52031 ) (accuweather docs) - Fix double subscriptions for local push notifications (@balloob
- #52039 ) (mobile_app docs) - Catch unexpected battery update payloads on Sonos (@jjlawren
- #52040 ) (sonos docs)
If you need help…
…don’t hesitate to use our very active forums or join us for a little chat
Experiencing issues introduced by this release? Please report them in our issue tracker


